Showing posts with label pastry dough. Show all posts

Monday, January 27, 2014

Chocolate Pastry Dough


Chocolate pastry dough?, you say. YES!, I say. 

Just think of the possibilities . . . Drool city, right? Can you imagine strawberry pie with a chocolate crust or chocolate empanadas with rasperry filling? Wow! 

But, the first thing I am making with this chocolate delight is chocolate fudge Pop-Tarts. Look for that post later this week. Until then, here is the recipe for the dough. What will you make with it?

What You Will Need:
Medium Bowl
Whisk
Pastry Cutter
Small Bowl
Rolling Pin
Silicone Mat or Clean Counter

Ingredients:
1 cup Soy Flour
1/2 cup Tapioca Starch/Flour
1/2 cup Corn Starch
1/4 cup Potato Starch
3 Tablespoons Cocoa Powder
2 Tablespoons Sugar
1 rounded teaspoon Xanthum Gum
1/2 teaspoon Salt
1 cup Unsalted Butter, cold
1 Extra Large Egg, cold
1 Tablespoon Apple Cider Vinegar
6 Tablespoons Water, Ice Cold
Soy Flour for dusting

Directions:
In a medium bowl, whisk together soy flour, tapioca starch, corn starch, potato starch, cocoa powder, sugar, xanthum gum, and salt.

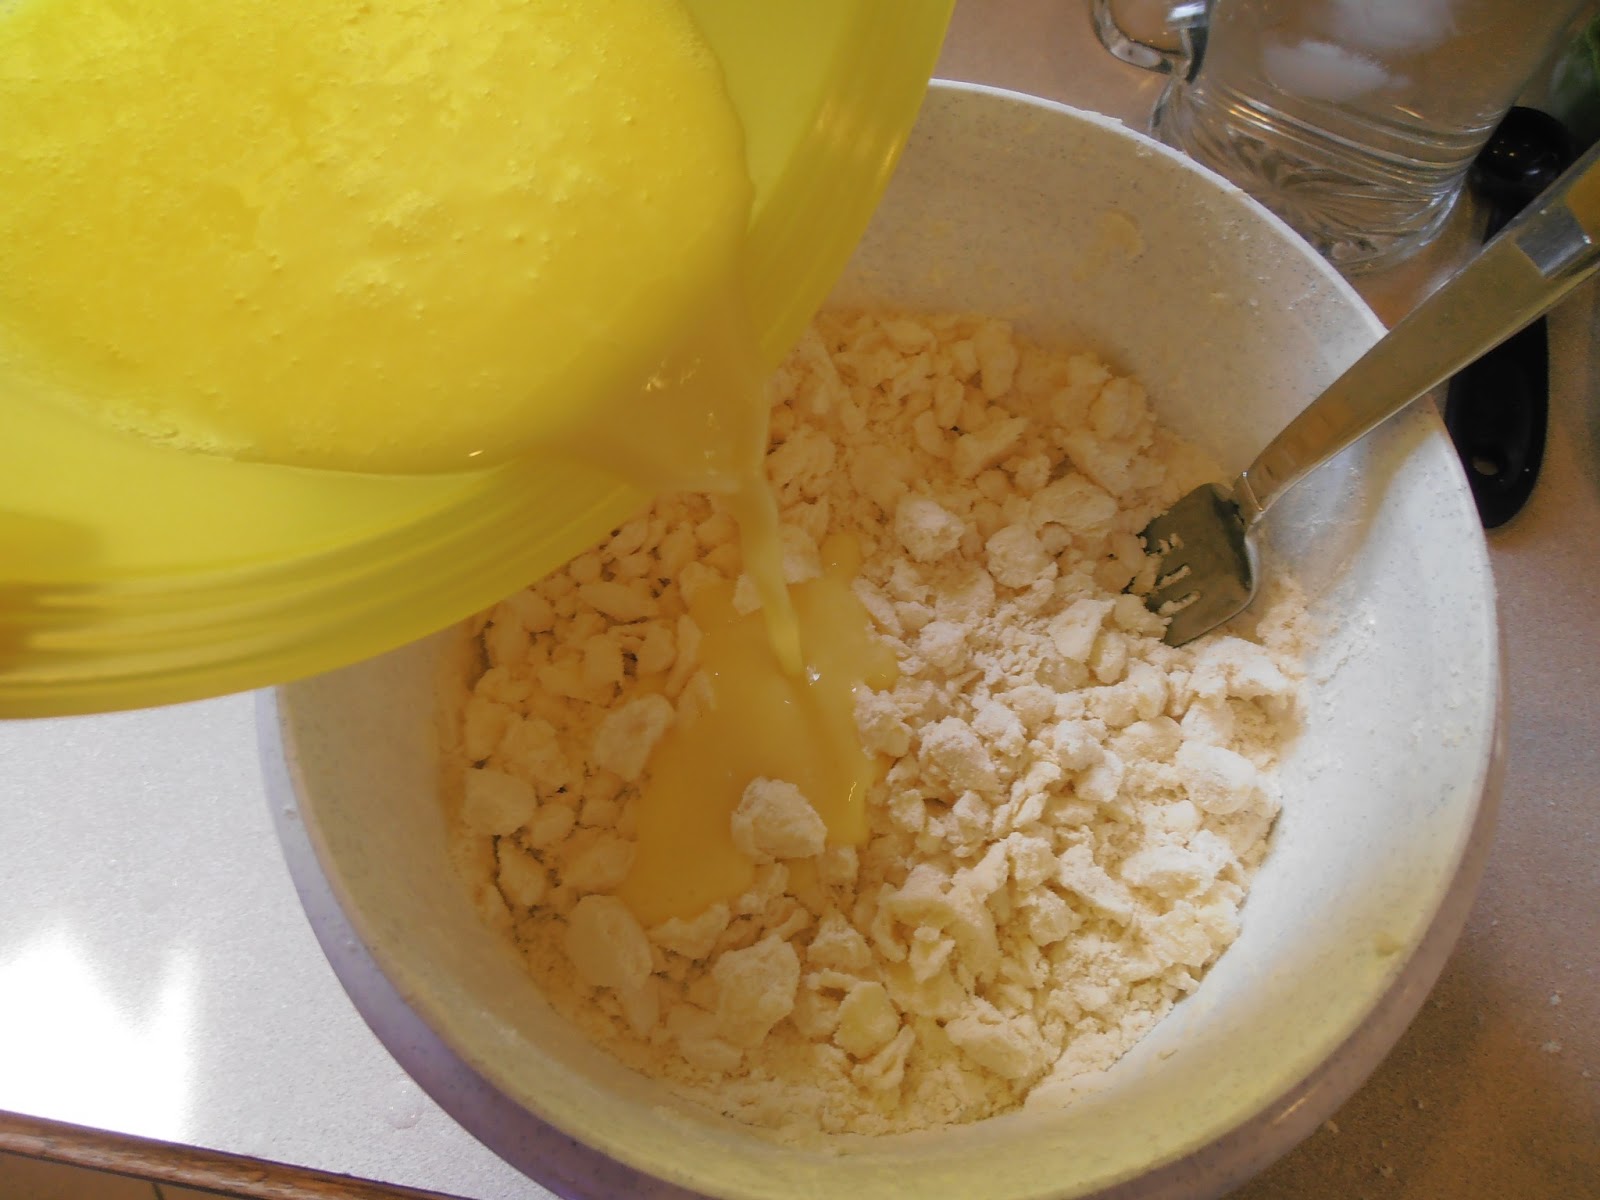
Slice butter and add to dry ingredients.

With pastry cutter, cut butter into dry ingredients until balls the size of peas are formed.

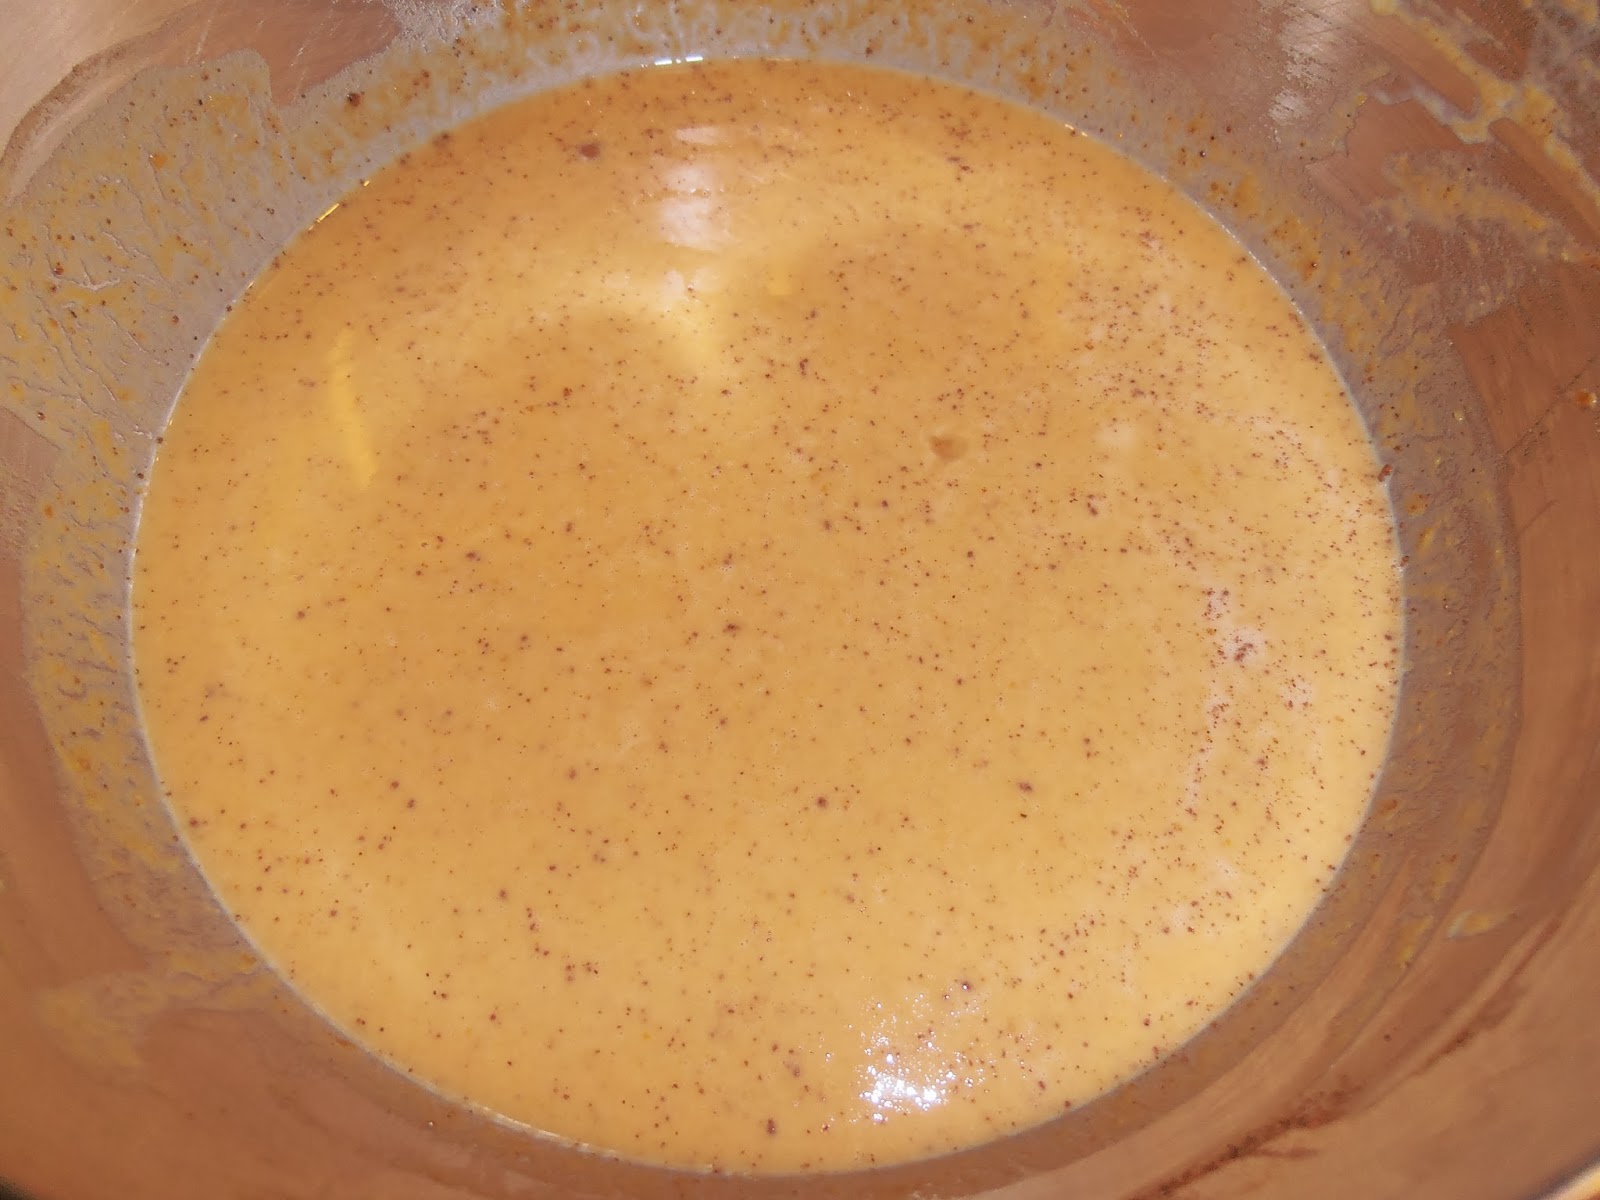
In a separate small bowl, beat the egg and mix in the vinegar and water.

Add the wet ingredients to the dry ingredients. Mix until the dough comes together to form a ball. You may (will likely) need to work this together with your hands.


Divide the dough in two, flatten into disks, and wrap in plastic wrap. Refrigerate for at least one hour.

Lightly dust silicone mat or clean counter top with soy flour. With rolling pin, roll out dough to 1/8-1/4" thick. 

There you have it. This dough is ready for whatever delicious creation you intend to use it for. 

"I didn't hear the question, but I am pretty sure chocolate is the answer."
Well, that about sums it up. Pretty much everything is better with chocolate.
~Sheryl

Tuesday, January 7, 2014

Berry Hand Pies


When I was a kid, I was a huge fan of Hostess fruit pies. I loved everything about them - the flaky crust, the gooey fruit filling, the sweet glaze; and how they all worked together to make a delicious treat.

This berry hand pie is an homage to the Hostess fruit pie of my youth. It has a flaky crust, gooey fruit filling and a sweet glaze. Eating them brings back lots of great memories. Will they do the same for you? 

What You Will Need:
Small Saucepan
Shallow Dish
Silicone Mat/Clean Counter
Rolling Pin
Circle Cookie Cutter (Approximately 3")
Cookie Sheets lined with Silicone Mats or Parchment Paper
Cooling Rack

Ingredients:
Pastry Dough (Posted on May 18, 2013)
Filling
2 cups Berries (I used blackberries, but strawberries, blueberries, or raspberries would also be great.)
1 Large Apple (Granny smith would be great, but I used what I had - I think it was a red delicious.); peeled, cored and chopped.
2/3 cup Sugar
2 Tablespoons Unsalted Butter
1 Tablespoon Tapioca Flour/Starch
1/4 teaspoon Cinnamon
2 Tablespoons Milk (for sealing crust and brushing the tops)
2 Tablespoons Sugar (for sprinkling the tops)
Glaze
6 Tablespoons Powdered Sugar
1 Tablespoon Milk

Directions:
In a small saucepan, cook the filling ingredients over medium heat, stirring constantly, until the mixture boils and thickens.

Pour the mixture into a shallow dish to cool.

Preheat oven to 375° F. Place racks in second to top and second to bottom slots.

On a lightly floured silicone mat or clean counter, roll out the pastry dough with a rolling pin to approximately 1/8"-1/4" thickness. Cut the dough with the circle cookie cutter.


Place a circle of dough on a lined cookie sheet, and place a heaping Tablespoon of filling in the center of the circle.

Take another circle of dough and press it between your thumb and fingers to flatten it slightly, so it is bigger than the bottom circle. 

Wet the edges of the bottom circle with milk.

Place the slightly stretched circle over the filling and line up the edges of the two circles. Press the edges with a fork to seal the edges together.

Cut a small x in the top of the hand pie.

Brush the top of the hand pie with milk.

Sprinkle with Sugar.

Bake for 15 minutes on top rack, then switch to bottom rack and bake for an additional 15 minutes or until golden. If baking two cookie sheets at once, place one sheet on each rack and swap at 15 minutes.

Transfer the hand pies to cooling racks to cool completely.

While hand pies are cooling, mix the glaze ingredients in a small bowl with a spoon.

Drizzle the glaze over the cooled hand pies.

Let the glaze set completely before serving or storing in an airtight container.

Yummy! These hand pies are perfect for a picnic or to stick in your lunch for a special treat. How about surprising your husband and/or kids by sneaking one in their lunch? Now that is a great idea.

"You are confined only by the walls you build yourself."
Don't let your walls confine you. Dream big, tear down your walls, and go after your dreams! 
~Sheryl

Friday, December 27, 2013

Pumpkin Pie


Merry Christmas! I hope you enjoyed celebrating with family and friends. I sure did. In fact, I still am. I have the pleasure of spending the winter break with my kids. I don't have to go back to work until after the new year. One of the ways we have been celebrating is eating pumpkin pie. But, this isn't just any pumpkin pie. This is my hubby's Aunt Peg's pumpkin pie. 

My husband has always loved this pumpkin pie recipe. I thought it was time to add it to my repertoire. After all, I don't bake anything that isn't gluten free anymore, so the only way he would get it is if I did. Aunt Peg's original recipe made 2+ pies (There was always filling left over.), but I only wanted to make one. So I cut the recipe in half and used gluten free crust of course.

This post is in honor of Aunt Peg. Sadly, Aunt Peg passed away in November of this year. She will be missed, but her pie recipe will fill our bellies with comfort for years to come. Give it a try, and let me know what you think.

What You Will Need:
Stand Mixer with Whisk Attachment
Silicone Mat or Clean Countertop
Rolling Pin
Pie Plate
Cooling Rack

Ingredients:
Pastry Dough (Posted on May 18, 2013)

2 1/4 cups Pumpkin Puree
1 cup Evaporated Milk
1 1/2 cups 1/2 & 1/2
4 Large Eggs
1/2 cup Sugar
3/4 cup Brown Sugar
3/4 teaspoon Cinnamon
1/2 teaspoon Ginger
1/4 teaspoon Nutmeg
1/4 teaspoon Ground Cloves

Directions:
Preheat oven to 410° F.

Mix sugar and eggs together. Add pumpkin, spices and milk. Blend until well combined.

Roll out pastry dough and place in pie plate.

Pour pie filling into pastry dough.


Bake for 10 minutes, then reduce heat to 350° F and bake for an additional 60-70 minutes or until knife in center comes out clean.


Let cool on cooling rack until completely cool.

Serve with fresh whipped cream.

"The magic of Christmas is not in the presents, but in His presence."
After all, it is about His birth.
~Sheryl


Sunday, December 8, 2013

Coconut Tarts


These coconut tarts are one of my hubby's favorite things. This recipe was handed down from his great Aunt Edye. She was an amazing baker, and I was lucky enough to get this recipe shortly after Tom and I were married. I like to keep them as a special treat, so I usually only make them about once or twice a year. Converting them to gluten free wasn't really all that tricky, since the filling is already gluten free. And, let's face it, as long as you have a decent pastry dough, it is really the filling that makes an amazing tart. 

I made this batch for Tom's birthday, which fell on Thanksgiving this year. Since I was also making pecan tarts (see the post from December 1, 2013), I tried to stretch the pastry dough. This recipe usually makes 9 tarts, but I filled the tarts a little more and only made 6. Keep that in mind when you make yours.

Let's get to it.

What You Will Need:
Round Cookie Cutter (Approximately 3")
Cupcake Tin
Non-Stick Cooking Spray
Cooling Rack

Ingredients:
Pastry Dough (Posted on May 18, 2013)
3/4 cup Sugar
1 cup Shredded Coconut
1 Large Egg
1 Tablespoon Milk
1 Tablespoon Butter

Directions:
Preheat oven to 375° F.

Once dough is rolled out, cut circles of dough with the cookie cutter.

Lightly spray the cupcake tin with the non-stick cooking spray. Place one circle of dough in each cupcake whole.

In a small bowl, mix all filling ingredients with a spoon until well combined.

Spoon filling into pastry cups.

Bake for approximately 20-30 minutes or until golden brown.
Remember that I filled these tarts a little more than
you should. Yours shouldn't bubble over as much as this,
and therefore will be easier to get out of the tins.
Let cool in the pans for 20 minutes, then transfer tarts to cooling racks to cool completely.

Let tarts cool completely before eating serving. 

I should tell you, my husband does NOT share his coconut tarts. That's how much he loves them. If you plan to share these, I recommend doubling, tripling or quadrupling the recipe. I hope you love them as much as the hubby does. I'm sure Aunt Edye would be thrilled that people are enjoying her recipe.

"Be so good they can't ignore you." ~ Steve Martin
Now that sounds like some good advice. 
~Sheryl

Sunday, December 1, 2013

Pecan Tarts


I hope you all enjoyed your Thanksgiving holiday. I had a great long weekend celebrating my hubby's birthday, spending time with family, shopping for some great deals, scrapbooking with friends, and of course, baking with my daughter. We made some incredible desserts, and I can't wait to share all of them with you. Let's start with these pecan tarts.

If you haven't guessed by now, I love personal sized desserts - cupcakes, cookies, single size cheesecakes, cake balls, and of course, tarts. I love them because they are easier to store, easier to serve and easier to transport than their full-size counterparts.

Are you ready? 

What You Will Need:
Round Cookie Cutter (Approximately 3")
Non-Stick Cooking Spray
Muffin Tins
Cooling Racks

Ingredients:
Pastry Dough (Posted on May 18, 2013)
1 cup Corn Syrup, Light or Dark (I used dark.)
3 Large Eggs
1 cup Sugar
2 Tablespoons Unsalted Butter, melted
1 teaspoon Pure Vanilla Extract
1 1/2 cups Pecans

Directions:
Preheat oven to 350°F.

Once dough is rolled out, cut circles of dough with the cookie cutter.

Lightly spray the muffin tins with the non-stick cooking spray. Place one circle of dough in each muffin tin.

In a bowl mix together corn syrup, eggs, sugar, butter and vanilla with a spoon.

Add pecans and stir.

Scoop batter into muffin tins, filling approximately 3/4 full.

Bake for 25-35 minutes. Let tarts cool in the tins for 20 minutes, then transfer to cooling racks to cool completely.

Aren't they beautiful? Trust me, they taste as good as they look. It is incredibly hard to eat just one. 

Make them yourself, you won't be disappointed. Let me know if you have the willpower to eat just one.


"Gratitude turns what we have into enough."

What a powerful statement. Do you have enough? Or do you need to spend some time counting your blessings? We all, including me, could spend a little more time on that. 
~Sheryl

Saturday, May 18, 2013

Pastry Dough/Pie Crust


I am so excited about this post. Pastry dough was another one of those things that eluded me for some time. I lived several years without it, just like my beloved brownies. The horrible thing about living without pastry dough is the fact that you have to live without lots of really delicious things, because it can  be used in so many wonderful ways, both savory and sweet. I tried a few recipes before getting this one right. Most of them were just too grainy. What I was looking for in a pastry dough was flaky, buttery goodness with no grit or grain. Do you want to know how I achieve it? Read on.

What You Will Need:
Pastry Cutter (If you don't have one, you can either pick one up at any store that sells kitchen gadgets for about $6.00 or you can use two butter knives and kind of work them in a scissor motion.)
Rolling Pin
Silpat or silicone mat (optional) - (If you don't have one of these, you can roll your dough on a well-floured surface. However, if you plan to make pastry dough on a fairly regular basis, I highly recommend investing in one. Even though I still have to use some flour with my silpat, it is still much easier to roll the dough.)
Plastic Wrap

Ingredients:
1 cup Soy Flour
1/2 cup Tapioca Flour/Starch
1/2 cup Corn Starch
1/4 cup Potato Starch
1 teaspoon Xanthum Gum
2 Tablespoons Sugar
1/2 teaspoon Salt
1 cup Butter, cold
1 Egg, cold
1 Tablespoon Apple Cider Vinegar
4 Tablespoons Water, Ice Cold

Directions:
1. In a bowl, whisk together the soy flour, tapioca starch, corn starch, potato starch, xanthum gum, sugar and salt.


2. Cut in the butter using the pastry cutter or two butter knives until you have lumps the size of kidney beans. 


I slice my butter into tablespoon size slices when
I add it to the bowl to make the job easier.

In case you have never seen one,
this is what a pastry cutter looks like.

This is the mixture after I used the pastry cutter.
3. In a separate bowl, beat the egg with a fork; then beat in the vinegar and water.


4. Stir the wet ingredients into the dry ingredients using a fork. You may have to finish the job with your hands. (Make sure they have been freshly washed.) You want the dough to come together to form a ball.


5. Divide the dough in half, place on plastic wrap, flatten into a disk, and wrap in the plastic wrap. Refrigerate for 1 or more hours. 


6. When you are ready to use your dough for whatever yummy deliciousness that you have chosen for the day, lightly flour your silpat and the top of your dough before rolling. Be sure to check occasionally that your dough isn't sticking to the silpat. Add more flour between the dough and your silpat if necessary. Roll the dough to the size you desire.


I received this rolling pin for Christmas,
and I just LOVE it!

This is my rolled out dough. It isn't perfect,
but that is OK. I prefer to think of it as artisan.
In my opinion, handmade dough shouldn't
be a perfectly formed shape.

There it is - a beautiful, buttery, flakey pastry dough just waiting for it's delicious destiny. What will you make with your dough? This particular ball of yum was used to make chicken pot pie. (Look for that in my next post.) You can use it for both sweet and savory dishes. Some of our favorites are apple pie, apple tart (This is a free formed bundle of joy with apples, caramel, and pecans. - I promise I will share this in a future post), pecan pie, coconut tarts, chicken pot pie. . . oh, the possibilities are endless. Share your favorite use for pastry dough in the comments.

"So, whether you eat or drink, or whatever you do, do all to the glory of God."
~1 Corinthians 10:31
Sheryl