Friday, December 27, 2013

Pumpkin Pie


Merry Christmas! I hope you enjoyed celebrating with family and friends. I sure did. In fact, I still am. I have the pleasure of spending the winter break with my kids. I don't have to go back to work until after the new year. One of the ways we have been celebrating is eating pumpkin pie. But, this isn't just any pumpkin pie. This is my hubby's Aunt Peg's pumpkin pie. 

My husband has always loved this pumpkin pie recipe. I thought it was time to add it to my repertoire. After all, I don't bake anything that isn't gluten free anymore, so the only way he would get it is if I did. Aunt Peg's original recipe made 2+ pies (There was always filling left over.), but I only wanted to make one. So I cut the recipe in half and used gluten free crust of course.

This post is in honor of Aunt Peg. Sadly, Aunt Peg passed away in November of this year. She will be missed, but her pie recipe will fill our bellies with comfort for years to come. Give it a try, and let me know what you think.

What You Will Need:
Stand Mixer with Whisk Attachment
Silicone Mat or Clean Countertop
Rolling Pin
Pie Plate
Cooling Rack

Ingredients:
Pastry Dough (Posted on May 18, 2013)

2 1/4 cups Pumpkin Puree
1 cup Evaporated Milk
1 1/2 cups 1/2 & 1/2
4 Large Eggs
1/2 cup Sugar
3/4 cup Brown Sugar
3/4 teaspoon Cinnamon
1/2 teaspoon Ginger
1/4 teaspoon Nutmeg
1/4 teaspoon Ground Cloves

Directions:
Preheat oven to 410° F.

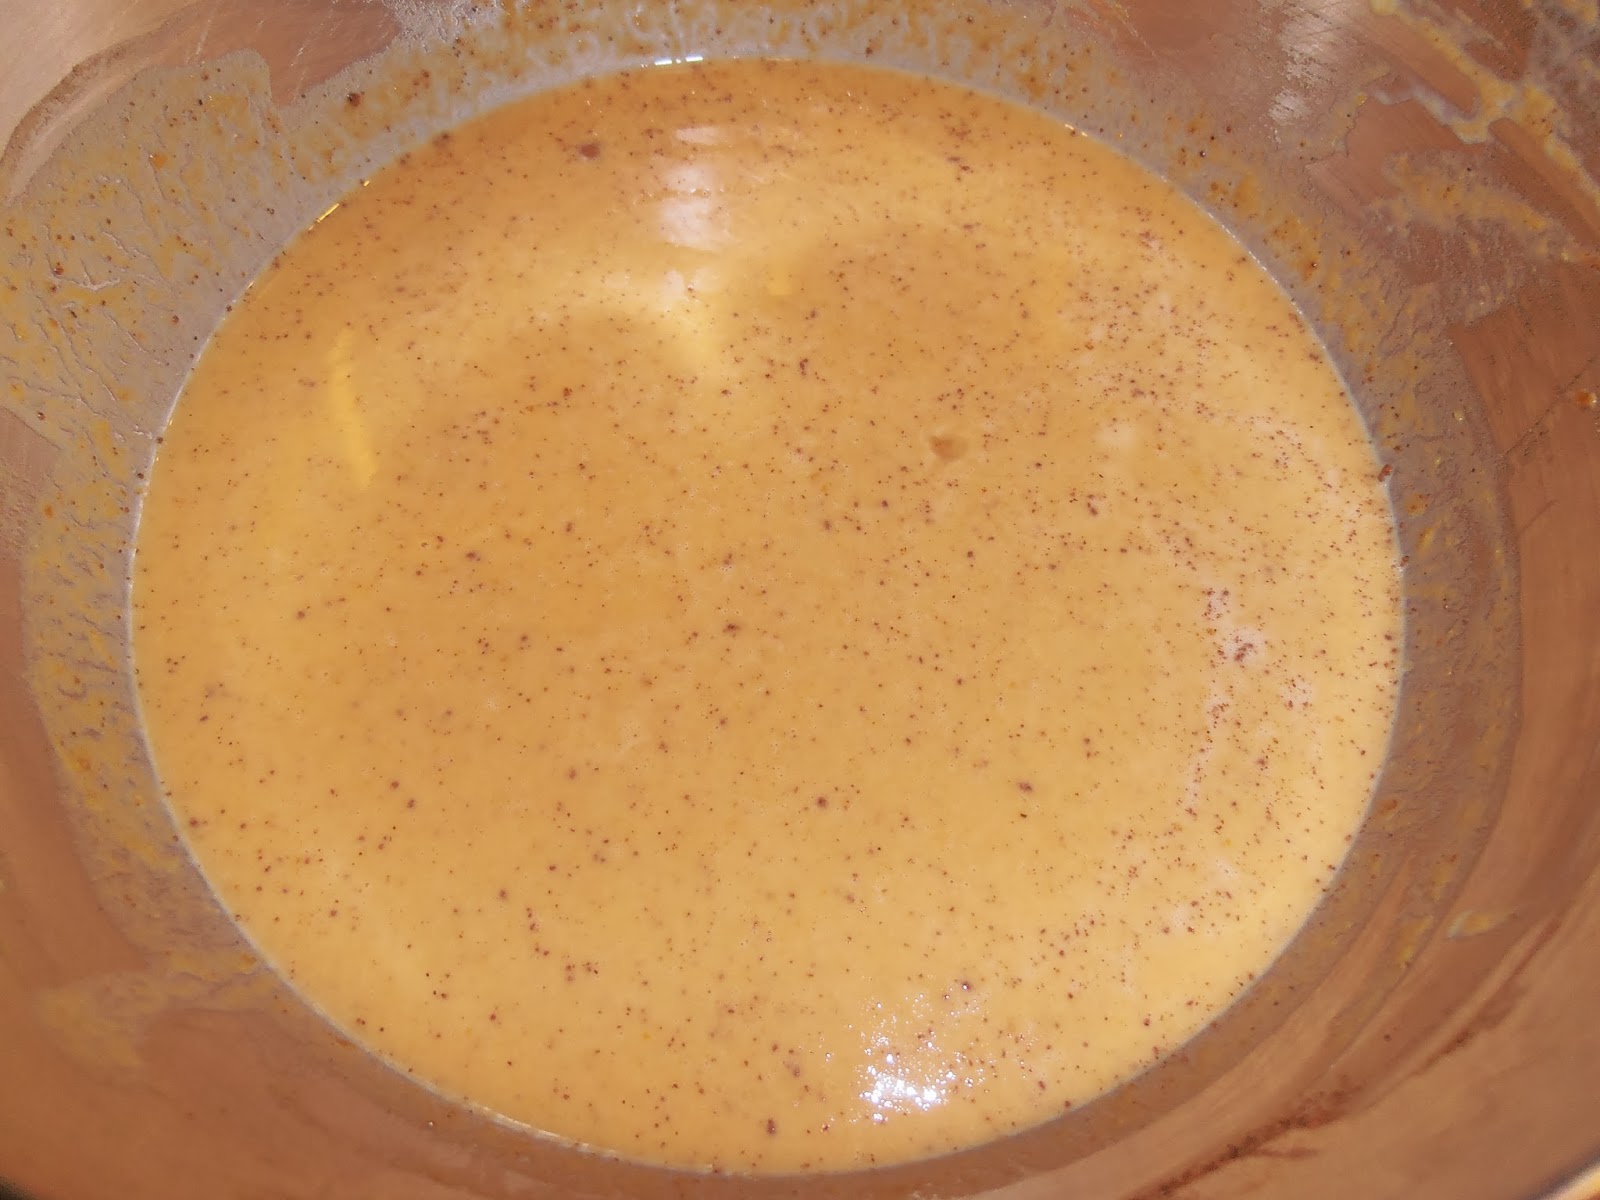
Mix sugar and eggs together. Add pumpkin, spices and milk. Blend until well combined.

Roll out pastry dough and place in pie plate.

Pour pie filling into pastry dough.


Bake for 10 minutes, then reduce heat to 350° F and bake for an additional 60-70 minutes or until knife in center comes out clean.


Let cool on cooling rack until completely cool.

Serve with fresh whipped cream.

"The magic of Christmas is not in the presents, but in His presence."
After all, it is about His birth.
~Sheryl


Thursday, December 19, 2013

Chocolate White Chocolate Chip Cookies


Are you a chocoholic like me? Then these cookies are for you! They are so rich and chocolatey. I just can't get enough of them. These are definitely going to become a staple in my kitchen. I love having delicious treats on hand to snack on, to share with guests, and to take as hostess gifts. These cookies are perfect.

Will you make them a staple in your kitchen too? There's only one way to find out. Let's get to it.

What You Will Need:
KitchenAid Mixer with Paddle Attachment
Small and/or Medium Scoop
Baking Sheets lined with Silicone Mats or Parchment Paper
Cooling Racks

Ingredients:
1 1/4 cups Unsalted Butter, room temperature
2 cups Sugar
2 Large Eggs
2 teaspoons Pure Vanilla Extract
3/4 cup Soy Flour
1/2 cup Potato Starch
1/2 cup Tapioca Starch/Flour
1/4 cup Corn Starch
1 teaspoon Xanthum Gum
3/4 cup Cocoa Powder
1 teaspoon Baking Soda
1/2 teaspoon Salt
1 1/2 cups White Chocolate Chips
1 bag Candy Cane Colorburst Candy Melts (Optional) + 2 teaspoons Canola Oil

Directions:
In KitchenAid Mixer with Paddle Attachment, cream together the butter and sugar.

Add eggs one at a time, mixing for one minute after each addition.

Add the vanilla.

In a small bowl, whisk together soy flour, potato starch, tapioca starch, corn starch, xanthum gum, cocoa powder, baking soda and salt.

Add dry ingredients to sugar mixture.

Add white chocolate chips.

Refrigerate dough for at least one hour. (This can be done before or after scooping. It is easier to scoop the soft dough, so I suggest doing the scooping first. You can scoop cookie balls, and place them in a container instead of on cookie sheets so they take up less room in the fridge.)

Scoop dough onto lined baking sheets.

For small scoop, bake for 9-13 minutes. For medium scoop, bake for 19-21 minutes. (I made some small and some medium. They both turned out great.)

Let cool on baking sheet for two minutes, then transfer to cooling racks to cool completely.


These cookies are incredibly yummy as is. My son described them as "more than blog worthy". In our house that means they are better than good.

But sometimes, I like to push the limits of awesome. So I took the small cookies and dipped them in peppermint flavored candy (Candy Cane Colorburst Candy Melts). Not only do they look good, but they taste pretty great too.

In a microwave safe bowl, melt candy melts and canola oil in 30 second increments, stirring after each, until completely melted.

Dip cookies in candy halfway.

Place on wax paper or parchment paper to set.


Now that is a pretty picture! These would be an amazing addition to your Christmas Cookie Tray. In case you are wondering, everyone who has tried these cookies both with and without the candy, have given me rave reviews. I hope you enjoy them too."Chocolate comes from cocoa, which comes out of a tree. That makes it a plant. Therefore, chocolate counts as salad. The end."

You're welcome!
~Sheryl

Tuesday, December 17, 2013

Cranberry Muffins


I love baking with fresh cranberries! These cranberry muffins are one of my favorite holiday treats. I love the way the sweet cake balances the tartness of the cranberries, and the nuts add just the right amount of crunch. If you don't like nuts, you can leave them out. I actually made this batch without them, because my son doesn't like nuts. However, I really prefer them WITH the nuts. That could be because I am a little nutty, or it could be because they are better. I'm not really sure. You be the judge.

What You Will Need:
KitchenAid Mixer with Paddle Attachment
Large Scoop
Muffin Tin(s)
Cupcake Liners
Cooling Rack(s)

Ingredients:
3 cups Fresh Cranberries (You can find these in the produce department of your local grocery store during the winter holidays.)
1 2/3 cups Sugar
2/3 cup Canola Oil
2 teaspoons Pure Vanilla Extract
4 Large Eggs
1 1/2 cup Soy Flour
3/4 cup Potato Starch
3/4 cup Tapioca Starch/Flour
1 teaspoon Xanthum Gum
2 teaspoons Baking Soda
1 teaspoon Salt
1 cup Walnuts, chopped (optional)

Directions:
Preheat oven to 350° F.

Line muffin tins with cupcake liners.

In a medium bowl, whisk together the soy flour, potato starch, tapioca starch, xanthum gum, baking soda and salt.

In KitchenAid Mixer with Paddle Attachment, mix together sugar, oil, vanilla and eggs until well combined.

Add cranberries and mix well.

Slowly add dry ingredients and mix until well combined.

Add nuts and mix just until combined.

Scoop into lined muffin tins.

Bake for 25 minutes or until golden brown.

Let cool in pans for 3 minutes, then transfer to cooling racks to cool completely.

Store in air tight container in the fridge for up to 10 days.


These are so amazing with a nice cup of hot tea on a lazy Saturday morning. OK, you got me, I don't know what a lazy Saturday morning is. But, when I dream of lazy Saturday mornings, you can bet that cranberry muffins and hot tea are part of that vision. A girl can dream!

"Do something today that your future self with thank you for."
I know my future self will appreciate the dream of lazy Saturday mornings with cranberry muffins and hot tea. I'm also quite certain she will like the chocolate cookies that I will be sharing with you in a few days. My son said "they are more than blog worthy!" They are that good. Don't miss them!
~Sheryl


Saturday, December 14, 2013

Chicken Rice Soup


There's nothing like a nice, hot bowl of soup on a cold, cold winter day. OK, so technically it isn't winter yet, but it sure feels like it. It has been below freezing on more than one occasion already this year, and there is a huge snowstorm pouring down on us as I type. I'm not super excited about that. I don't do well with cold weather. I sure love the way fresh fallen snow looks, but as soon as I have to continue my "regularly scheduled life" with it, I get a little cranky. So, I try to do little things to brighten my mood. Homemade soup is one of those things.

The beauty of this soup is that it is beyond easy to make, and it is versatile. You can make it with chicken, turkey, or really whatever bird you like; and you can use rice, couscous, wild rice, brown rice, or really any grain you like. And since you use cooked meat and cooked rice, it is a perfect recipe for leftovers. Yep, you got it, pull out all of those plastic containers from your fridge and see what you've got. You may have the makings for an amazing cup/bowl of soup.

Just follow this simple recipe.

What You Will Need:
Dutch Oven or Large Pot
Wooden Spoon

Ingredients:
2 Tablespoons Unsalted Butter
1 cup Carrots, chopped
1 cup Onions, chopped
2 Tablespoons Soy Flour
1 Tablespoon Potato Starch
1 Tablespoon Tapioca Starch/Flour
2 cartons (32 ounces each) Gluten Free Chicken Stock
3 cups Rice (grain), cooked
3 cups Chicken (poultry), shredded or chopped (I used the leftover half of a roasted chicken from Costco.)
1 teaspoon Ground Pepper
1 teaspoon Garlic Powder
1 teaspoon Onion Powder
1 teaspoon Celery Salt
2 teaspoons Chopped Parsley
2 cups Milk (anything but fat free)

Directions:
In a dutch oven over medium-high heat, add butter and vegetables. "Sweat" vegetables until carrots are tender and onions are clear.

Add soy flour, potato starch and tapioca starch and stir until thick.

Slowly add chicken stock, stirring to incorporate flours. Cook until boiling, stirring constantly.

Reduce heat to low-medium, add rice, chicken and spices. Stir to incorporate. Let simmer for 10-15 minutes.

Slowly add milk and stir. Let simmer for an additional 5 minutes.

Serve it while it is hot. If you are a purist, leave it alone. If not, serve it with your favorite gluten free crackers or croutons.


MMmmm! So simple and so delicious. I hope this warms your belly and your heart on these bitter cold, snowy days!

"Love and cook with wild abandon"
Sounds like a plan to me.
~Sheryl

Sunday, December 8, 2013

Coconut Tarts


These coconut tarts are one of my hubby's favorite things. This recipe was handed down from his great Aunt Edye. She was an amazing baker, and I was lucky enough to get this recipe shortly after Tom and I were married. I like to keep them as a special treat, so I usually only make them about once or twice a year. Converting them to gluten free wasn't really all that tricky, since the filling is already gluten free. And, let's face it, as long as you have a decent pastry dough, it is really the filling that makes an amazing tart. 

I made this batch for Tom's birthday, which fell on Thanksgiving this year. Since I was also making pecan tarts (see the post from December 1, 2013), I tried to stretch the pastry dough. This recipe usually makes 9 tarts, but I filled the tarts a little more and only made 6. Keep that in mind when you make yours.

Let's get to it.

What You Will Need:
Round Cookie Cutter (Approximately 3")
Cupcake Tin
Non-Stick Cooking Spray
Cooling Rack

Ingredients:
Pastry Dough (Posted on May 18, 2013)
3/4 cup Sugar
1 cup Shredded Coconut
1 Large Egg
1 Tablespoon Milk
1 Tablespoon Butter

Directions:
Preheat oven to 375° F.

Once dough is rolled out, cut circles of dough with the cookie cutter.

Lightly spray the cupcake tin with the non-stick cooking spray. Place one circle of dough in each cupcake whole.

In a small bowl, mix all filling ingredients with a spoon until well combined.

Spoon filling into pastry cups.

Bake for approximately 20-30 minutes or until golden brown.
Remember that I filled these tarts a little more than
you should. Yours shouldn't bubble over as much as this,
and therefore will be easier to get out of the tins.
Let cool in the pans for 20 minutes, then transfer tarts to cooling racks to cool completely.

Let tarts cool completely before eating serving. 

I should tell you, my husband does NOT share his coconut tarts. That's how much he loves them. If you plan to share these, I recommend doubling, tripling or quadrupling the recipe. I hope you love them as much as the hubby does. I'm sure Aunt Edye would be thrilled that people are enjoying her recipe.

"Be so good they can't ignore you." ~ Steve Martin
Now that sounds like some good advice. 
~Sheryl

Wednesday, December 4, 2013

Salted Caramel Chocolate Nutella Sandwich Cookies


I've been wanting to make a gourmet sandwich cookie for some time now, and some of you may know that chocolate and caramel is one of my all time favorite flavor combinations. (Just take a look at my past posts, and you will find lots of recipes with these two flavors. I just can't help myself!) So, of course I thought a chocolate and caramel sandwich cookie would be pretty awesome, but I really wanted to kick it up a notch. Since salted caramel seems to be all the rage and Nutella is a fancy chocolate spread, I thought why not incorporate the two into my gourmet chocolate caramel sandwich cookie. 

I think the result is really great, but it wasn't until my nephew, Jeremy, tried them on Thanksgiving, that I knew they were the bomb-diggity. I have to be honest, there was some controversy about the salt content in these cookies. Some thought they may be a little too salty (my daughter was one such individual). When she was refusing to eat one, because they were too salty, Jeremy let everyone know that they were AMAZING (I can't tell you what he actually said, because it might offend some, but suffice it to say, he really loved them.).

If you love salted caramel, you will love these cookies. In my opinion, the salt enhances the caramel flavor. You be the judge. Try them for yourself.

Here's how you do it. . .

What You Will Need:
Coffee Grinder, Food Processor or Blender
KitchenAid Mixer with Paddle Attachment and Whisk Attachment
Whisk
Small Scoop
Baking Sheet(s)
Silicone Mat(s) or Parchment Paper
Cooling Racks

Ingredients:
Nutella Cookies
1/2 cup Soy Flour
1/4 cup Tapioca Starch/Flour
1/4 cup Potato Starch
1/4 cup Corn Starch
1 teaspoon Xanthum Gum
1/2 cup Cocoa Powder
1/4 cup Oats, lightly ground
1 teaspoon Baking Soda
1/4 teaspoon Baking Powder
3/4 cup Unsalted Butter, room temperature
2 Tablespoons Nutella
1 1/2 cup Sugar
1 Large Egg
Salted Caramel Buttercream Frosting
1/2 cup Unsalted Butter, room temperature
1 cup Powdered Sugar
1/2 cup Caramel Sauce (I had some left over from a recent recipe. Click here for the recipe.)
1 1/4 teaspoon Kosher Salt
1 teaspoon Pure Vanilla Extract

Directions:
Preheat oven to 375° F.

Line baking sheet(s) with silicone mat(s) or parchment paper.

In a coffee grinder, food processor or blender, lightly grind oats. I used a coffee grinder. (I've never used it for coffee, just oats and things for baking.)


In a small bowl, whisk together soy flour, tapioca starch, potato starch, corn starch, xanthum gum, cocoa powder, ground oats, baking soda, and baking powder. Set aside.

In KitchenAid Mixer bowl with paddle attachment, cream together butter, Nutella and sugar until light and fluffy.

Mix in egg.

Slowly add in flour mixture until evenly incorporated.

Don't be alarmed this is a very thick and sort of dry
looking batter. It comes together nicely when you
roll it.

Scoop small balls of dough into the palm of your hand.

Roll into a ball and place on lined baking sheet approximately 2 inches apart.

Gently smoosh the balls with the bottom of a glass until approximately 1/8" thick.

Bake for 8 minutes. Cool for 2 minutes on cookie sheet.

Transfer to cooling racks to cool completely.

In a KitchenAid mixer bowl with whisk attachment, cream together butter and sugar. Start slowly to avoid getting sugar all over you and your countertop.

Add caramel sauce.

Add salt.

Add vanilla.

Whip until light and fluffy.

Fill a gallon size freezer bag with frosting and snip the corner.

Pipe frosting onto the flat side of one chocolate cookie.

Place another chocolate cookie on top flat side down.

Voila! You now have a Salted Caramel Chocolate Nutella Sandwich Cookie. Repeat until all cookies have been joined.


Amazing, right?!?!?!?

"Our job is to love others without stopping to inquire whether or not they are worthy."

Wow! I love that. If only it were that easy, right? But, that is what Jesus did. Let's strive to more like Him! The world would certainly be a better place if we do.
~Sheryl