Monday, June 10, 2013

Chicken and Dumplings


I apologize for my absence for the past few days. I was out of town this weekend for a friend's wedding. We had a great time celebrating, and I had it all planned out that I would blog about red velvet brownies with white chocolate frosting on Sunday when I returned home. Unfortunately, after I made the brownies, my husband and I decided they were not blog-worthy. I am still perfecting the recipe. I promise I will post it as soon as I get it right.

Until then, I thought I would share this delightful recipe for chicken and dumplings. This is a twist on the traditional chicken and dumplings I usually make. It's fun to change things up every now and then.

Ingredients:
3-4 Boneless, Skinless Chicken Breasts; seasoned, cooked and cut into pieces
2 Tablespoons Butter
1/2 cup Onion, chopped
1 Tablespoon minced Garlic
1 cup Carrot, chopped
1 teaspoon Parsley 
1 teaspoon Italian Seasoning
1/2 teaspoon Salt
1/2 teaspoon Pepper
1 teaspoon Tapioca Flour/Starch
2 cups Chicken Broth
1 cup Milk

For Dumplings:
3/4 cup Sorghum Flour
3/4 cup Potato Starch
1/2 cup Tapioca Flour/Starch
3 teaspoons Baking Powder
1 teaspoon Xanthum Gum
1 teaspoon Salt
6 Tablespoons Shortening
1 cup Milk

Directions:
1. Season, cook and chop chicken. Chop onion and carrots.

2. In a large skillet over medium heat, melt butter. 

3. Add onions and and carrots.


4. Add garlic and herbs and cook until onions and carrots are tender.

5. Sprinkle tapioca flour over vegetables. Add chicken broth and stirring to incorporate tapioca flour.

6. Add chicken.

7. Add milk, stir well, simmer for 10 minutes, stirring occasionally.


8. Pour mixture into greased 9x13 pan.

9. Preheat oven to 375° F.

10. In a small bowl, whisk together sorghum flour, potato starch, tapioca starch, baking powder, xanthum gum and salt. 

11. Cut in shortening with pastry cutter.

12. Mix in milk.

13. Drop dumpling mixture by spoonful onto chicken mixture. Bake for 20-30 minutes or until dumplings are golden brown.

Now that is blog-worthy!

"Not caring what other people think is the best choice you will ever make."
Sheryl

Thursday, June 6, 2013

Yummy Lemon Herb Chicken


I had some lemons left from the Lemon Glazed Lemon Muffins, so I thought it would be nice to use them for a chicken dinner. I also needed to use my crock pot, because my son had a hockey game tonight. This recipe worked out perfect. I put it on right before we left for the game, and it was ready when we got home from his victory.

I had planned to call this chicken recipe Lemon Herb Chicken, because I am a big fan of keeping it simple; but then I served it to my family for dinner, and my daughter wanted to call it Green Lemony Yummy Chicken. I decided to compromise and call it Yummy Lemon Herb Chicken. That's fair, right?

I think you are going to like this one. Serve it with some rice and your favorite green vegetable, and you have a well balanced, yummy meal.

What You Will Need:
Skillet
Crock Pot

Ingredients:
3-4 Boneless, Skinless Chicken Breasts, cut into strips
1/2 cup Tapioca Flour/Starch
1 teaspoon Salt
1 teaspoon Pepper
1 teaspoon Italian Seasoning
1/4 cup Butter
1 teaspoon Parsley
1 teaspoon Italian Seasoning
1 teaspoon Onion Powder
1 teaspoon Minced Garlic
1 teaspoon Sugar
3/4 cup Chicken Broth
1/2 cup Fresh Squeezed Lemon Juice (2 Large or 4 Small Lemons)

Directions:
1. Cut chicken breasts into strips.

2. In a quart size zip bag, mix tapioca flour, salt, pepper and 1 teaspoon italian seasoning. Put half of the chicken strips in the bag, zip and shake to coat. 

3. Melt 2 tablespoons of butter in skillet or medium heat. 

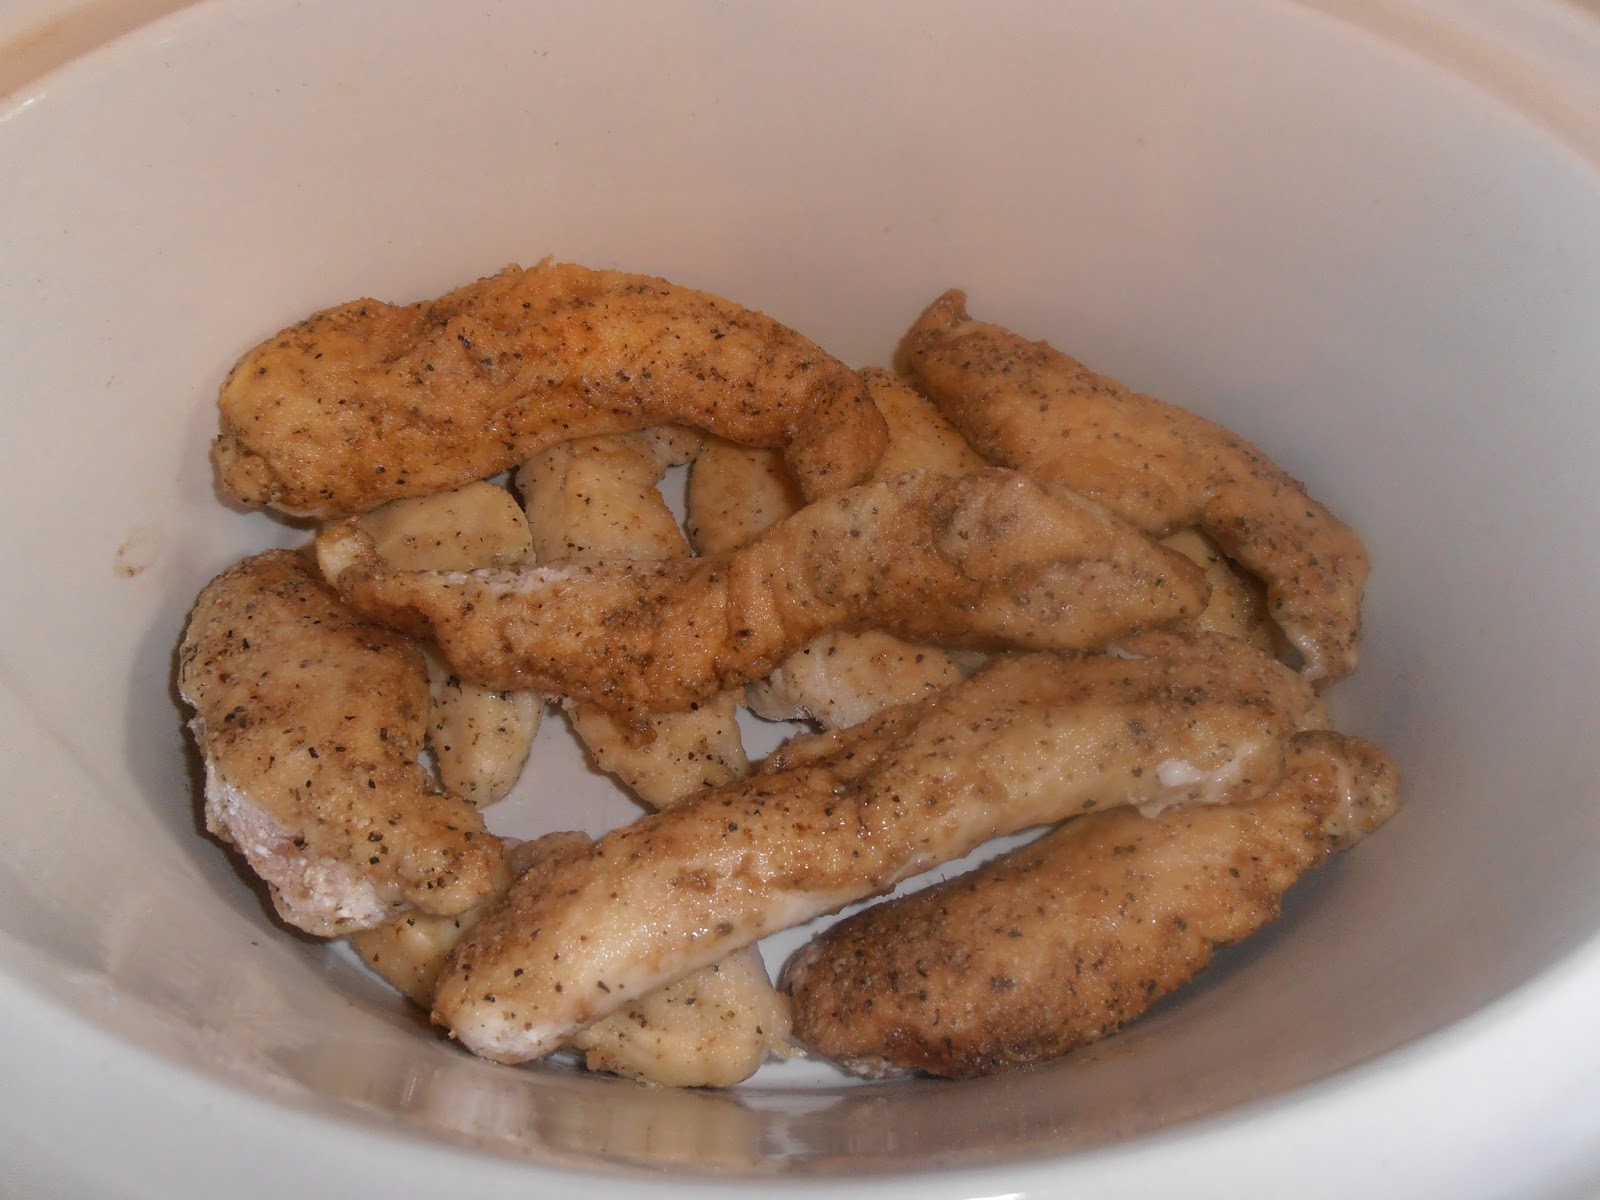
4. Brown floured chicken strips in skillet over medium heat - approximately 2 minutes on each side. You are not fully cooking the chicken, just browning it.

5. Place browned chicken strips into crock pot.

6. Repeat steps 2 through 5 with remaining chicken strips.

7. Sprinkle parsley, remaining 1 teaspoon italian seasoning, onion powder, and garlic over chicken. 

8. Mix sugar and lemon juice. Pour mixture over chicken.

9. Pour chicken stock over chicken.

10. Cook on low for 3 - 3 1/2 hours.


Enjoy your yummy lemon herb chicken. My family sure did. 

"Everybody is a genius. But if you judge a fish by its ability to climb a tree, it will live its whole life believing that it is stupid." ~ Albert Einstein
Sheryl

Tuesday, June 4, 2013

Chocolate Lava Cake


Who doesn't love chocolate lava cakes? 

I mean, really, a volcano of chocolately goodness exploding from a moist chocolate cake. Pair it with vanilla ice cream and chocolate fudge sauce, and you can't stop the party in your mouth.

Lava cakes are all the rage these days. Have been for some time. Probably because they are so amazingly delicious, and they have a bit of a wow factor. I always thought they would be difficult to make. But much to my surprise, quite the contrary is true. 

I found the original recipe at Everyday Occasions by Jenny Steffens Hobick. Her recipe isn't gluten free, so I had to play around with it a little. But after a couple tries, I got it just right. See for yourself how simple they truly are to make.

Makes 12 Lava Cakes

What You Will Need:
Muffin Tins
Whisk
Baking Sheets

Ingredients:

2 Tablespoons Butter
2 Tablespoons UnSweetened Cocoa

1 cup less 2 Tablespoons Butter
1 1/2 cup Chocolate Chips
1/2 cup Heavy Cream
5 Large Eggs
1 cup Sugar
1/3 cup Soy Flour
1/3 cup Potato Starch
1 teaspoon Xanthum Gum

Directions:
1. Use 2 tablespoons of butter and 2 tablespoons of cocoa to grease and dust the muffin tins. Set aside.

2. Place butter, chocolate chips and heavy cream in a small, microwave safe bowl. Melt in the microwave on high stirring every 30 seconds until chocolate and butter are melted completely.


3. While chocolate mixture is cooling, place sugar, soy flour, potato starch, xanthum gum and eggs in a medium bowl. 

4. When chocolate is cooled slightly, stir it in with the flour and other ingredients. Mix until incorporated.

5. Pour batter into prepared muffin tins. Refrigerate for at least one hour or up to 2 days.

6. Preheat oven to 450° F. Bake cakes for 10 minutes.

7. Cool cakes in pan for 5 minutes, then invert on cookie sheet.

8. Use a spatula to transfer cakes to serving dishes. Serve warm with vanilla ice cream and chocolate fudge sauce. 

Your friends and family will be super impressed when you serve these at your next party or get-together. Just make sure that you make a few extra, because they will go fast and some will want seconds. I'd love to hear how it goes. 

"If your dreams don't scare you, they're not big enough."
Sheryl


Sunday, June 2, 2013

Fried Rice


Last night was leftover night at the Darroch house, but I was in the mood for something a little fancier than baked chicken breasts and white rice. So, to jazz it up a bit I decided to make fried rice with the chicken and rice. This is super simple to make, and crazy delicious. It is also very versatile. You can use whatever meat or vegetables that you have. 

Before I tell you how to make it, we should have a little talk about soy sauce. Did you know that soy sauce is not gluten free? True story. There are actually only four ingredients in traditional soy sauce. They are water, wheat, soybeans and salt. I know, it was a shock to me as well. Yet another favorite I had to live without until I discovered a beautiful liquid substance lovingly known as Tamari. Tamari is gluten free soy sauce made with 100% soy. Yummy! I threw a little party when I welcomed chinese food back into my diet. It was a party in my head, but a party none the less.

What You Will Need:
Large Frying Pan

Ingredients:
Remember you can use the meat and vegetables of your choice. This is what I used, because it is what I had. You can also increase or decrease the measurements based on how many you are serving or what you have.

2 Tablespoons Sesame Oil
1/2 cup Chopped Carrots
1/2 cup Frozen Peas (Thawed)
2 Tablespoons Minced Garlic
1 Large Egg
1 cup Chopped, Cooked Chicken Breasts
2 cups Cooked Rice (Leftover from a previous meal works best.)
1/4 cup Tamari Sauce

Directions:
1. Gather and prep ingredients.


2. In large frying pan, heat sesame oil over medium heat.

3. Add carrots, peas and garlic to pan. Cook until vegetables are tender.

 4. Add egg to pan. Scramble egg.


5. Add chicken, rice and tamari sauce. Stir and cook until heated through.


I hope you enjoy this fried rice recipe, and have fun trying all of the wonderful variations that are possible. I look forward to hearing your favorite variation.

If you are having trouble finding Tamari sauce in your local store, you can order it from The Gluten Free Mall.

"An essential aspect of creativity is not being afraid to fail." ~Unknown

Sheryl


Friday, May 31, 2013

Lemon Glazed Lemon Muffins


When life gives you lemons, make lemon glazed lemon muffins! I was recently layed off from my full-time job, so as you can imagine, I have been feeling a little like I've been handed a bucket full of lemons. Well, actually, I feel like I was sucker punched, but they are basically the same thing, right? You may be able to sneak in a sucker punch, but I won't stay down for long. So, instead of wallowing in misery, I decided to make these oh so delicious muffins. Take that life!

Ironically enough I found a recipe for lemon loaf on Pinterest recently that looked really good. I love Pinterest. I find all kinds of inspiration there. But back to the recipe - you can find the original recipe at Sweet Pea's Kitchen. Her recipe is not gluten free. No problem, I love a challenge, especially when I am feeling a little down. Since I was converting the recipe to gluten free, I decided to make it all my own by making a few other modifications as well. I made muffins instead of a loaf (Well, that isn't entirely true. I made both.), and I decided  not to use the lemon syrup that her recipe calls for. I am so glad I decided to take this one on. It turned out amazing. It is so moist and lemony! Just what I needed to lift my spirits.

What You Will Need:
Whisk
Zester
KitchenAid Mixer with Paddle Attachment
Muffin Tins
Aluminum Muffin Papers (It is important to use the aluminum ones. The paper ones will stick to your muffins and tear them to pieces.)
Cooling Racks
Cookie Sheets with Sides or Restaurant Pans

Makes 36 Muffins

Ingredients:
For Muffins
1 1/2 cup Soy Flour
3/4 cup Potato Starch
1/2 cup Corn Starch
1/4 cup Tapioca Starch/Flour
2 teaspoons Xanthum Gum
2 teaspoons Baking Powder
1/4 teaspoon Baking Soda
1 teaspoon Salt
2 1/2 cups Sugar
8 Large Eggs (room temperature)
1/4 cup Grated Lemon Zest (2 Large or 4 Small Lemons)
1/4 cup Fresh Lemon Juice (1 Large or 2 Small Lemons)
2 cups Unsalted Butter (melted and cooled)
1/2 cup Sour Cream (room temperature)
1 Tablespoon Vinegar
2 teaspoons Vanilla Extract
For Lemon Glaze
2 cups Powdered Sugar
4-6 Tablespoons Fresh Lemon Juice (1 Large or 2 Small Lemons)

Directions:
1. In a medium bowl, whisk together the soy flour, potato starch, corn starch, tapioca starch, xanthum gum, baking powder, baking soda and salt. Set aside.
Dry ingredients ready for whisking.
2. Place aluminum muffin papers in muffin tins and set aside. (I cheated. I only made 24 muffins, so I could make a loaf as well. I greased and floured my loaf pan.)

3. Zest and juice lemons. Set Aside.
I received this nifty zester for Christmas. It was
part of a set of kitchen gadgets. Thanks Mom!
4. In your KitchenAid mixer bowl, combine sugar, eggs, lemon zest and lemon juice. Mix on low with paddle attachment.
Adding the lemon zest.

5. Slowly add butter, sour cream, vinegar and vanilla. Mix on low until combined. Mixture will look lumpy.
Adding the vanilla.

Liquid ingredients after mixing.

6. Transfer the liquid mixture to a large bowl.
Tranferring liquid mixture to a large bowl.

7. Preheat oven to 350° F. 

8. Add dry mixture 1/3 at a time to the liquid mixture. Fold in gently until combined.
Folding in dry mixture.

Batter is ready for baking.

9. Scoop batter into muffin tins. Fill tins 1/2-3/4 full. Bake for 15 minutes, rotate pans, reduce heat to 325° F, and bake for an additional 20 minutes or until toothpick inserted in center comes out clean. (For my loaf, I left it in the oven for an additional 20 minutes.)
I always use my handy scoop for muffins and
cupcakes. It is the perfect measurement and
a lot less messy.

Ready for the oven.

10. Cool in pans for 10 minutes. Transfer to cooling racks and cool completely. 
Cooling down and anxiously awaiting the glaze.

11. While the muffins are cooling, make the glaze. In a small bowl, whisk ingredients together. Start with 4 Tablespoons of lemon juice, and add additional Tablespoons one at a time until glaze is thick by pourable. 
Adding lemon juice to the powdered sugar.

Mixing this glaze is a work out, so be prepared. 

12. When muffins are completely cool, place the cooling racks on cookie sheets/restaurant pans. Pour glaze over muffins. Let glaze harden before storing in air tight container. 
You may notice that the glaze on the loaf and
two of the muffins is much whiter and thicker
than the rest of the muffins. That is because
I decided that it was too thick after I glazed
those, so I added more lemon juice. Those
are still good, but the glaze is more like frosting
than glaze. It is all about preference. That is the
beauty of baking, you can make it how you like it!

I have a confession to make. I made a huge error when I was making these muffins. Have you noticed that my muffins and my loaf look a little deflated in the center? Yes, and because of that the glaze is pooling in the middle. That is all due to my error. So, what was my error, you ask. Well, I accidentally put 2 teaspoons of baking soda instead of baking powder in the mixture when I was measuring my dry ingredients. Normally, I would consider starting over and scrapping the ingredients; but considering my recent lay off, I can't really afford to throw anything away. So, I decided to try it and see what happens. The good news is they still taste amazing.

Did you know that baking powder has baking soda in it? It does. So, I just left out the baking powder all together. However, the result is deflated muffins. Why? Because, baking soda reacts when it gets wet. It puffs up really early, then it is done. But, baking powder has ingredients in it that make it react twice, once when it gets wet and the second time when it gets hot. That is why baked goods with baking powder hold their fluff. If you want the technical explanation, you should do some research. This is just my layman's explanation. Anyway, the even better news is that when you make this recipe, and use the correct ingredients with the correct measurements; your muffins will be fluffy and beautiful, not sunken and sad like mine. You can learn from my mistakes. Your welcome! :)

Enjoy your fluffy lemon glazed lemon muffins! Please tell me what you think in the comments.


"You never know how STRONG you are, until being STRONG is the only choice you have."
Sheryl