Friday, March 14, 2014

Lemon Poppy Seed Cookies


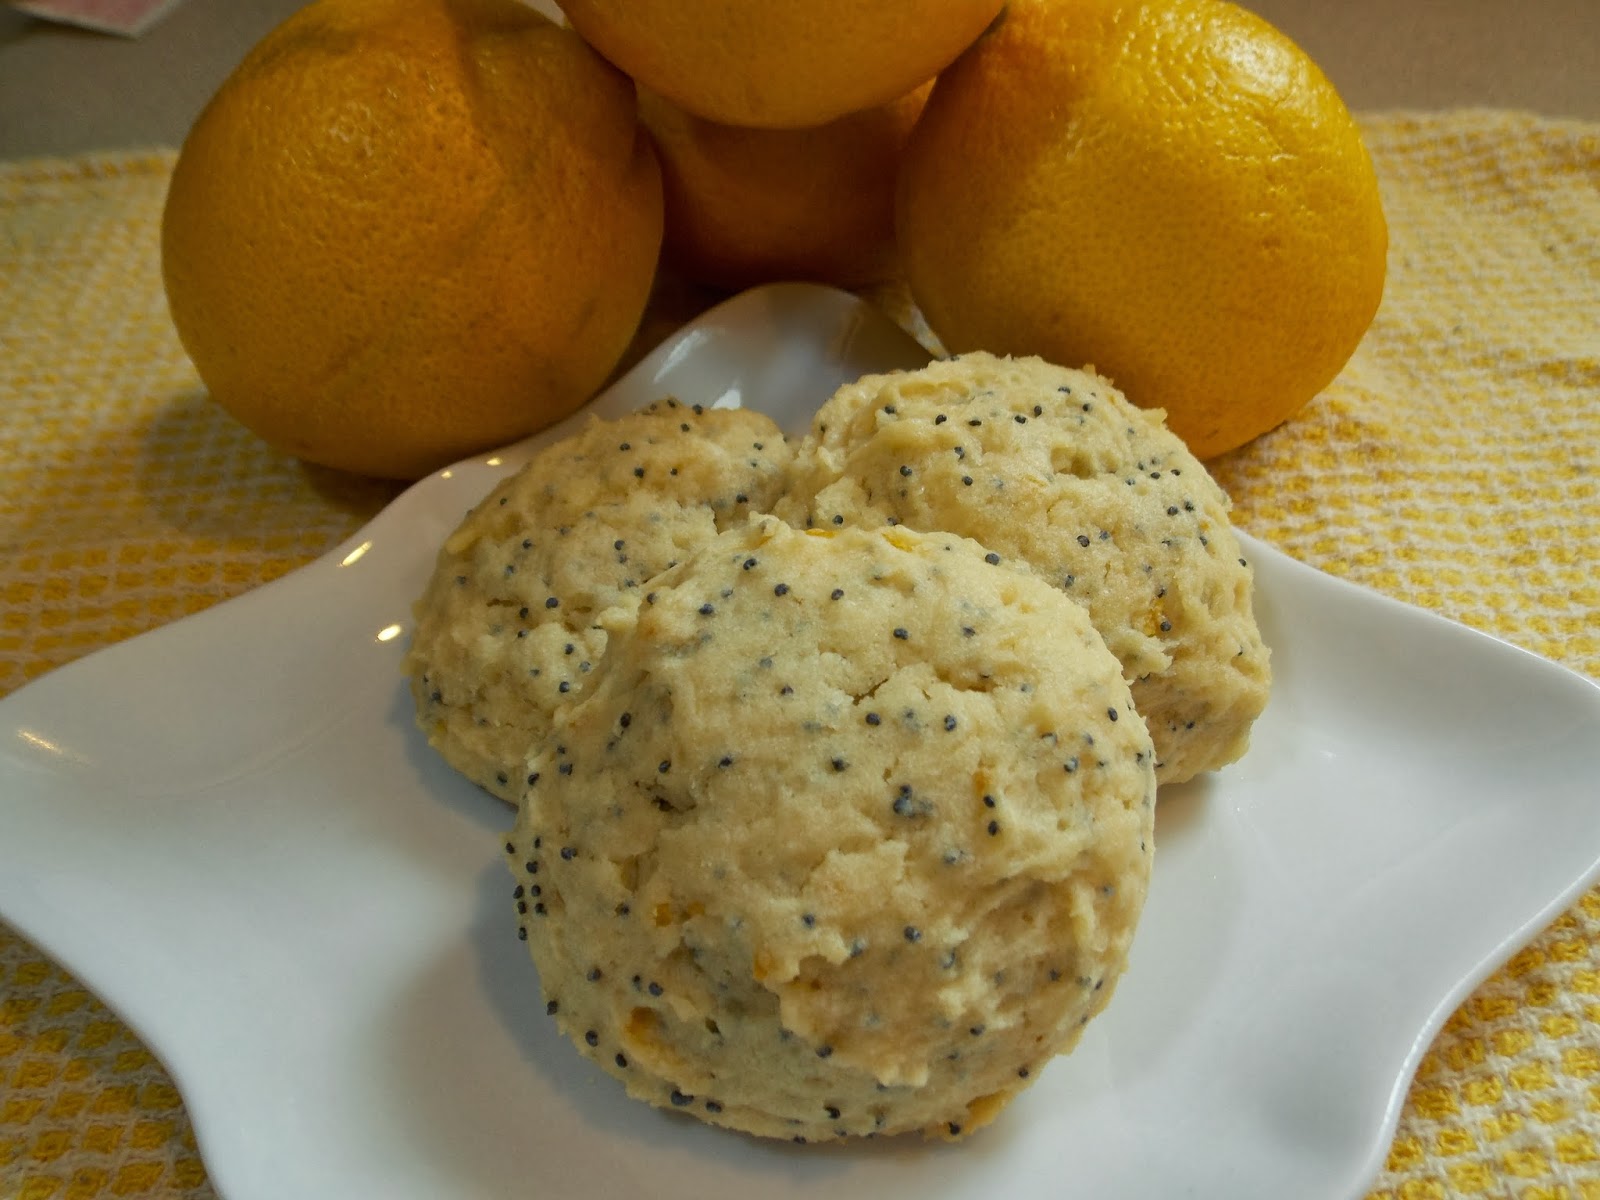
These cookies are light, airy and refreshing, with a little crunch from the poppy seeds. Although I don't drink tea very often, I think they would be perfect for tea time. They might possible go well with coffee as well, but I just don't do coffee at all. Try them for yourself and let me know what you think.

What You Will Need:
Medium Bowl
Whisk
Stand Mixer with Whisk Attachment
Lemon Zester
Medium Scoop
Plastic Container
Wax Paper
Cookie Sheet(s)
Silicone Mat(s) or Parchment Paper
Cooling Rack(s)

Ingredients:
1 1/2 cups Soy Flour
1/2 cup Tapioca Starch/Flour
1/2 cup Potato Starch
1/4 cup Corn Starch
1 teaspoon Xanthum Gum
1 teaspoon Baking Powder
1/2 teaspoon Salt
1 cup Unsalted Butter, room temperature
1 1/2 cup Sugar
2 Large Eggs, room temperature
4 Tablespoons Lemon Juice, freshly squeezed
2 Tablespoons Lemon Zest, chopped
2 Tablespoons Poppy Seeds

Directions:
In a medium bowl, whisk together soy flour, tapioca starch, potato starch, corn starch, xanthum gum, baking powder and salt.

In standmixer with whisk attachment, cream together the butter and sugar.

Zest and juice the lemon.

 Add eggs to the butter and sugar mixture.

Add poppy seeds.

Add lemon zest.

Add lemon juice.

With the mixer on low, slowly add the dry ingredients.

 Using medium scoop, scoop dough into a plastic container. Place wax paper between the layers of dough balls. Refrigerate for at least 2 hours.


Preheat oven to 350° F.

Place dough balls on silicone lined cookie sheets approximately 2 inches apart, and bake for 18 minutes.

Cool on cookie sheets for two minutes, then transfer to cooling racks until cooled completely.


Makes about 3 dozen.

I've always loved the way lemon and poppy seeds go together. Don't you?

"The difference between who you are and who you want to be is what you do."

So go out a do something!
~Sheryl
Follow and Like I Can't Believe It's Gluten Free on Facebook.

Wednesday, March 12, 2014

S'mores Cupcakes


Are you tired of this winter yet? I have been for some time now. Even our vacation in Florida last month with temperatures in the high 70's didn't help me to feel better about this bitter, cold, snowy mess that won't quit. So, I decided to bring a little summer into the kitchen. Actually, this recipe was my daughter's idea. We have been working on it off and on for some time now. The cupcake flavor was a bit of a challenge, but we figured it out.

The cupcakes are graham flavored. Most people make graham crackers and graham flavored things with graham flour; but as you might guess, it is not gluten free. So, we tried a couple different things before we got it right. Then we filled the cupcakes with chocolate filling and frosted them with toasted marshmallow frosting. They are crazy good. I mean crazy good! 

Ingredients:
Cupcakes
1/2 cup Unsalted Butter, room temperature
1/2 cup Brown Sugar, firmly packed
1/2 cup Honey
1 1/2 Tablespoons Molasses
2 Large Eggs, room temperature
1 teaspoon Vanilla
3/4 cup Soy Flour
1/2 cup Tapioca Starch/Flour
1/2 cup Potato Starch
2 1/2 teaspoons Baking Powder
1/2 teaspoon Baking Soda
1/2 teaspoon Xanthum Gum
1/2 teaspoon Salt
3/4 cup Milk, hot
Chocolate Filling
1/4 cup Cocoa Powder
1/3 cup Brown Sugar
2/3 cup Milk
1/4 teaspoon Salt
1/2 cup Milk Chocolate
2 Tablespoons Unsalted Butter
2 teaspoons Pure Vanilla Extract
1/2 cup Milk Chocolate
Marshmallow Frosting
4 Large Egg Whites, room temperature

1 cup Sugar
1/4 teaspoon Cream of Tartar
1/8 teaspoon Salt
1 teaspoon Pure Vanilla Extract

Directions:
Preheat oven to 350° F.

Line cupcake tins with cupcake liners. Set aside

In stand mixer with whisk attachment, beat butter, sugar, honey and molasses until smooth.

Mix in eggs.

Mix in vanilla.

In a medium bowl, whisk together soy flour, tapioca starch, potato starch, baking powder, baking soda, xanthum gum and salt.

With mixer on low, slowly add 1/3 of the dry ingredients, 1/2 the milk, 1/3 of the dry ingredients, the other half of the milk, and the final 1/3 of the dry ingredients.


Using a medium scoop, scoop batter into lined cupcake tins. Bake for 20 minutes.

Let cool in pans for 5 minutes, then transfer cupcakes to cooling racks to cool completely.

While cupcakes are cooling, make chocolate filling. 

In a small saucepan over medium heat, mix together cocoa powder, brown sugar, milk, salt and milk chocolate until boiling.


Remove from heat; add butter, vanilla and milk chocolate; and stir until completed mixed. Let cool and thicken.


When chocolate filling has cooled, fill cupcakes. We put the chocolate filling in a squeeze bottle, and used the handle of a spoon to create a whole in the cupcakes. (When I make these again, I will fill the cupcakes with more chocolate filling than this time.)


To make the marshmallow frosting, fill a medium saucepan with 1 inch of water and bring it to a simmer over medium heat.

Place the eggs whites, sugar, cream of tartar and salt in the stand mixer bowl and whisk by hand to combine. Place the bowl in the saucepan, making sure the bottom of the bowl is not touching the water. Heat the egg mixture, whisking constantly, until the sugar has dissolved and the mixture is hot to the touch (about 120° F) about six minutes.

Transfer the bowl to the stand mixer fitted with the whisk attachment. Turn the mixer to medium and whisk for 1 minute. Increase the speed to high and whisk until stiff, glossy peaks form, about 5 minutes more. Add the vanilla and whisk until just incorporated, about 1 minute. 

Transfer frosting to a gallon size zip-top bag and snip a corner to use as a pastry bag. Pipe the frosting onto the cupcakes.

Using a kitchen torch, lightly toast the marshmallow frosting. There you have it - S'mores Cupcakes! Share with your friends and family to bring some sunshine into your life. Enjoy!

After all, "Sunshine is the best medicine!"
~Sheryl


Follow and Like I Can't Believe It's Gluten Free on Facebook.

Wednesday, February 26, 2014

Super Soft Gluten Free Bread


I did it again! This gluten free bread is super soft, hence the name; and it tastes really great. One of the differences is that it is made with oat flour instead of sorghum flour, so the flavor is closer to white bread than my "Even Better Gluten Free Bread". The baking technique is also different. Instead of letting the dough rise for hours, this one is baked right away. This technique is the one I use for my french bread (post coming soon), and I am thrilled with the result.

This bread is perfect for sandwiches, toast, french toast, or anything else you can think of. Tell me, how will you use it?

What You Will Need:
Stand Mixer with Paddle Attachment
Small Bowl
Medium Bowl
Whisk
Spatula
Loaf Pan
Non-Stick Cooking Spray
Brush
Cooling Rack

Ingredients:
2 Tablespoons Yeast
1 Tablespoon Sugar
1 1/4 cup Milk (110° F)
1 1/2 cup Oat Flour
3/4 cup Potato Starch
3/4 cup Tapioca Starch
1 teaspoon Xanthum Gum
1 teaspoon Guar Gum
2 teaspoon Salt
1 teaspoon Apple Cider Vinegar
1 Tablespoon Butter, room temperature
3 Large Egg Whites, room temperature
1 Large Egg White whisked with 1 Tablespoon Water for egg wash

Directions:
In small bowl, mix together yeast, sugar and milk. Set aside for 5-10 minutes.

In medium bowl, whisk together oat flour, potato starch, tapioca starch, xanthum gum, guar gum and salt.

In stand mixer with paddle attachment, beat together egg whites, apple cider vinegar and butter.


Slowly add dry ingredients mixing in between additions.

Add yeast mixture and beat on medium for 2 minutes.


Spray loaf pan with non-stick cooking spray.

Pour dough into prepare loaf pan. Smooth top with wet fingers.

Brush top of loaf with egg wash.

Place loaf pan in cold oven on middle rack. Set oven to 425°F, and bake for 30-35 minutes or until internal temperature is 200°F. Let cool in pan for 10 minutes, then transfer to cooling rack to cool completely.

MMmmm. Look at that amazing loaf of bread.


Not only does it look good, but the smell was overwhelming. I really had to exert a ton of self-control to keep from eating this whole loaf before I was able to photograph it. 

"Don't shine so that others can see you. Shine so that through you others can see Him." ~ C.S. Lewis

After all, that is really all He asks us to do.
~Sheryl


Follow and Like I Can't Believe It's Gluten Free on Facebook.

Monday, February 24, 2014

Raspberry Chocolate Bars


These bars are a delightful marriage of sugar cookie, raspberry jam, and chocolate. Of course, I love all of these things, and was sure these would be incredible. However, when my friends, my husband and I first tried them, we weren't completely sold on them. 

But, I hate to throw out baked goods; so I put them in a sealed container, and left them for the next day. Oh how surprised I was when I tried them again the next day. 

Trust me, these bars are 100 times better the next day. My advice is to make them at night before you go to bed, and wait to eat them until the next day.

What You Will Need:
Small Bowl
Whisk
Fork
9 x 13 Pan
Small Saucepan
Large Spoon

Ingredients:
3/4 cup Soy Flour
1/2 cup Tapioca Starch
1/4 cup Potato Starch
3/4 cup Sugar
3/4 cup Unsalted Butter, room temperature
1 pint  Fresh Raspberries (You could also use frozen, thawed and drained)
1/4 cup Water
1 Tablespoon Corn Starch
3/4 cup Semi-Sweet Chocolate Chips
1/2 cup White Chocolate Chips
1 Tablespoon Canola Oil

Directions:
Preheat oven to 350°F.

In small bowl, whisk together soy flour, tapioca starch, potato starch and sugar.

Add butter and mix with a fork until pea size lumps are formed.


Press mixture into 9x13 pan and bake for 15 minutes.


Mix together corn starch and water.


In small saucepan, mix together corn starch mixture and raspberries. Heat to boiling, stirring constantly. Boil and stir for one minute. Cool 10 minutes.


Sprinkle chocolate chips over baked crust.


Spoon raspberry mixture evenly over chocolate chips.


Bake for 20 minutes or until raspberry mixture is set.

Refrigerate until chocolate is firm.

Melt white chocolate chips and canola oil in microwave in 30 second increments, stirring after each increment, until completely melted. Cool for 2 minutes. Spoon into a zip-top bag, clip the corner, and drizzle over bar. Refrigerate overnight.

Cut into 2 inch squares and serve. Store in an air-tight container.

Just try them. You will like them.

Many are the plan's in a person's heart, but it is the Lord's purpose that prevails. ~Proverbs 19:21

Don't let this discourage you. God's plans are ALWAYS better. Sometimes it takes a while for them to unfold, but they are ALWAYS better.


~Sheryl


Follow and Like I Can't Believe It's Gluten Free on Facebook.