This recipe has been improved and is now called Even Better Gluten Free Bread. Find it here.
Bread - what an amazing invention! I mean, after all, they wouldn't say, "It is the best thing since sliced bread.", if bread wasn't amazing, right? I LOVE bread: the crunchy crust, the soft middle, all of those air pockets from the rising of the yeast, and the taste - oh my, don't get me started. I love it hot out of the oven dipped in olive oil and herbs, toasted with butter, grilled with ham and cheese between two slices, baked with garlic butter and cheese, dipped in pot roast gravy, and the list goes on. I can think of a million ways to use bread. It is one of the most versatile ingredients. It can be used for breakfast, lunch, dinner, snacks and desserts.
Living without bread was extremely difficult, but not nearly as difficult as eating some of the gluten free breads on the market. I can't tell you how much money I wasted trying to find one that was edible. There was this one time my husband and I went on a mission to find gluten free products. We went to our local healthy food store (to remain nameless) and found some gluten free english muffins that looked pretty good. They were extremely expensive, but we decided to bite the bullet and try them anyway.
The next morning my hubby cooked up a great looking breakfast of fried over-easy eggs (you know with soft egg yolks perfect for dipping) and toasted english muffins. It had been so long since I had experienced eggs with bread to dip in them. I was practically drooling. I couldn't break the yolk and dip that english muffin fast enough. After I took a bite, I thought they were pretty bad, but tried to keep an open mind. I asked my hubby to try them. He took one bite and immediately spit it out. It was so dry and tasteless that he couldn't even swallow it.
I was devastated. I thought I would never find gluten free bread that was edible. Then one day, my mother clipped an article with gluten free recipes from the newspaper and gave it to me. There was a recipe for french bread in that article. I finally decided to try making my own gluten free bread. Since then, I have experimented a lot to come up with my own bread recipes. This is one of my favorites.
What You Will Need:
2 Loaf Pans (I use stone pans, but you can use metal or silicone pans if that is what you have.)
KitchenAid Mixer with whisk and dough hook attachment
Plastic Wrap
Non-stick Cooking Oil Spray
Cooling Rack
Ingredients:
1 1/2 cups Sorghum Flour
3/4 cup Tapioca Starch/Flour
3/4 cup Potato Starch
3/4 cup Corn Starch
1/4 cup Ground Flax Meal
1 Tablespoon Xanthum Gum
1 Tablespoon Guar Gum
2 teaspoons Salt
2 Tablespoons Active Yeast
1 Tablespoon Sugar
2 cups Milk (warm)
3 Large Eggs (room temperature)
1/4 cup Butter (room temperature) + some for greasing loaf pans
2 teaspoons Cider Vinegar
1/3 cup Honey
Directions:
1. Grease loaf pans and set aside.
 |
| I use a cold stick of butter to grease my stone pans. If you have metal or silicone pans, you can use non-stick cooking oil spray; but don't use it on stone pans. |
 |
| Dry ingredients before whisked. |
 |
| Yeast mixture after approximately 5 minutes. |
 |
| My trusty KitchenAid Mixer with dough hook attachment. |
 |
| Wet ingredients before mixing. |
 |
| Wet ingredients after mixing. |
 |
| Mixture with first half of dry ingredients added. |
 |
| This is the mixture after adding all of the dry ingredients. It looks like a hot mess; but don't worry, it will come together. |
7. Divide dough between the two loaf pans. Smooth the tops with wet fingers.
 |
| Loaves after tops have been smoothed. |
 |
| I usually let my dough rise in the oven, but it was a very warm day, so I left it on the counter. |
 |
| The dough after it has risen. It is ready for the oven. |
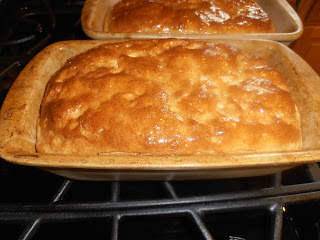
9. Preheat oven to 375° F. Place pans in the oven, and bake for 45-55 minutes (or 35-45 minutes for stone pans). Internal temperature should be 200° F. Butter tops of loaves immediately upon pulling out of oven.
 |
| Don't tell me that doesn't look amazing! |
10. Let cool in pans for 10 minutes, then completely on wire cooling racks. If you want to serve hot bread, let cool for a total of 15-20 minutes before serving. Believe me, it will still be hot.
 |
| Why isn't there a whole loaf in this picture? Because my family and I have already devoured more than half a loaf. It is that good! |
If you have more control than me, and you find that you actually have bread to store, keep it in a plastic bag in the fridge. You can also freeze it. If you freeze it, I recommend slicing it first. Then you can take out what you need and leave the rest in the freezer.
I hope you find this bread as satisfying as I do.
"Don't ask yourself what the world needs. Ask yourself what makes you come alive and then go do that. Because what the world needs is people who have come alive." ~Howard Thurman
Sheryl


No comments:
Post a Comment