Showing posts with label cupcakes. Show all posts

Wednesday, March 12, 2014

S'mores Cupcakes


Are you tired of this winter yet? I have been for some time now. Even our vacation in Florida last month with temperatures in the high 70's didn't help me to feel better about this bitter, cold, snowy mess that won't quit. So, I decided to bring a little summer into the kitchen. Actually, this recipe was my daughter's idea. We have been working on it off and on for some time now. The cupcake flavor was a bit of a challenge, but we figured it out.

The cupcakes are graham flavored. Most people make graham crackers and graham flavored things with graham flour; but as you might guess, it is not gluten free. So, we tried a couple different things before we got it right. Then we filled the cupcakes with chocolate filling and frosted them with toasted marshmallow frosting. They are crazy good. I mean crazy good! 

Ingredients:
Cupcakes
1/2 cup Unsalted Butter, room temperature
1/2 cup Brown Sugar, firmly packed
1/2 cup Honey
1 1/2 Tablespoons Molasses
2 Large Eggs, room temperature
1 teaspoon Vanilla
3/4 cup Soy Flour
1/2 cup Tapioca Starch/Flour
1/2 cup Potato Starch
2 1/2 teaspoons Baking Powder
1/2 teaspoon Baking Soda
1/2 teaspoon Xanthum Gum
1/2 teaspoon Salt
3/4 cup Milk, hot
Chocolate Filling
1/4 cup Cocoa Powder
1/3 cup Brown Sugar
2/3 cup Milk
1/4 teaspoon Salt
1/2 cup Milk Chocolate
2 Tablespoons Unsalted Butter
2 teaspoons Pure Vanilla Extract
1/2 cup Milk Chocolate
Marshmallow Frosting
4 Large Egg Whites, room temperature

1 cup Sugar
1/4 teaspoon Cream of Tartar
1/8 teaspoon Salt
1 teaspoon Pure Vanilla Extract

Directions:
Preheat oven to 350° F.

Line cupcake tins with cupcake liners. Set aside

In stand mixer with whisk attachment, beat butter, sugar, honey and molasses until smooth.

Mix in eggs.

Mix in vanilla.

In a medium bowl, whisk together soy flour, tapioca starch, potato starch, baking powder, baking soda, xanthum gum and salt.

With mixer on low, slowly add 1/3 of the dry ingredients, 1/2 the milk, 1/3 of the dry ingredients, the other half of the milk, and the final 1/3 of the dry ingredients.


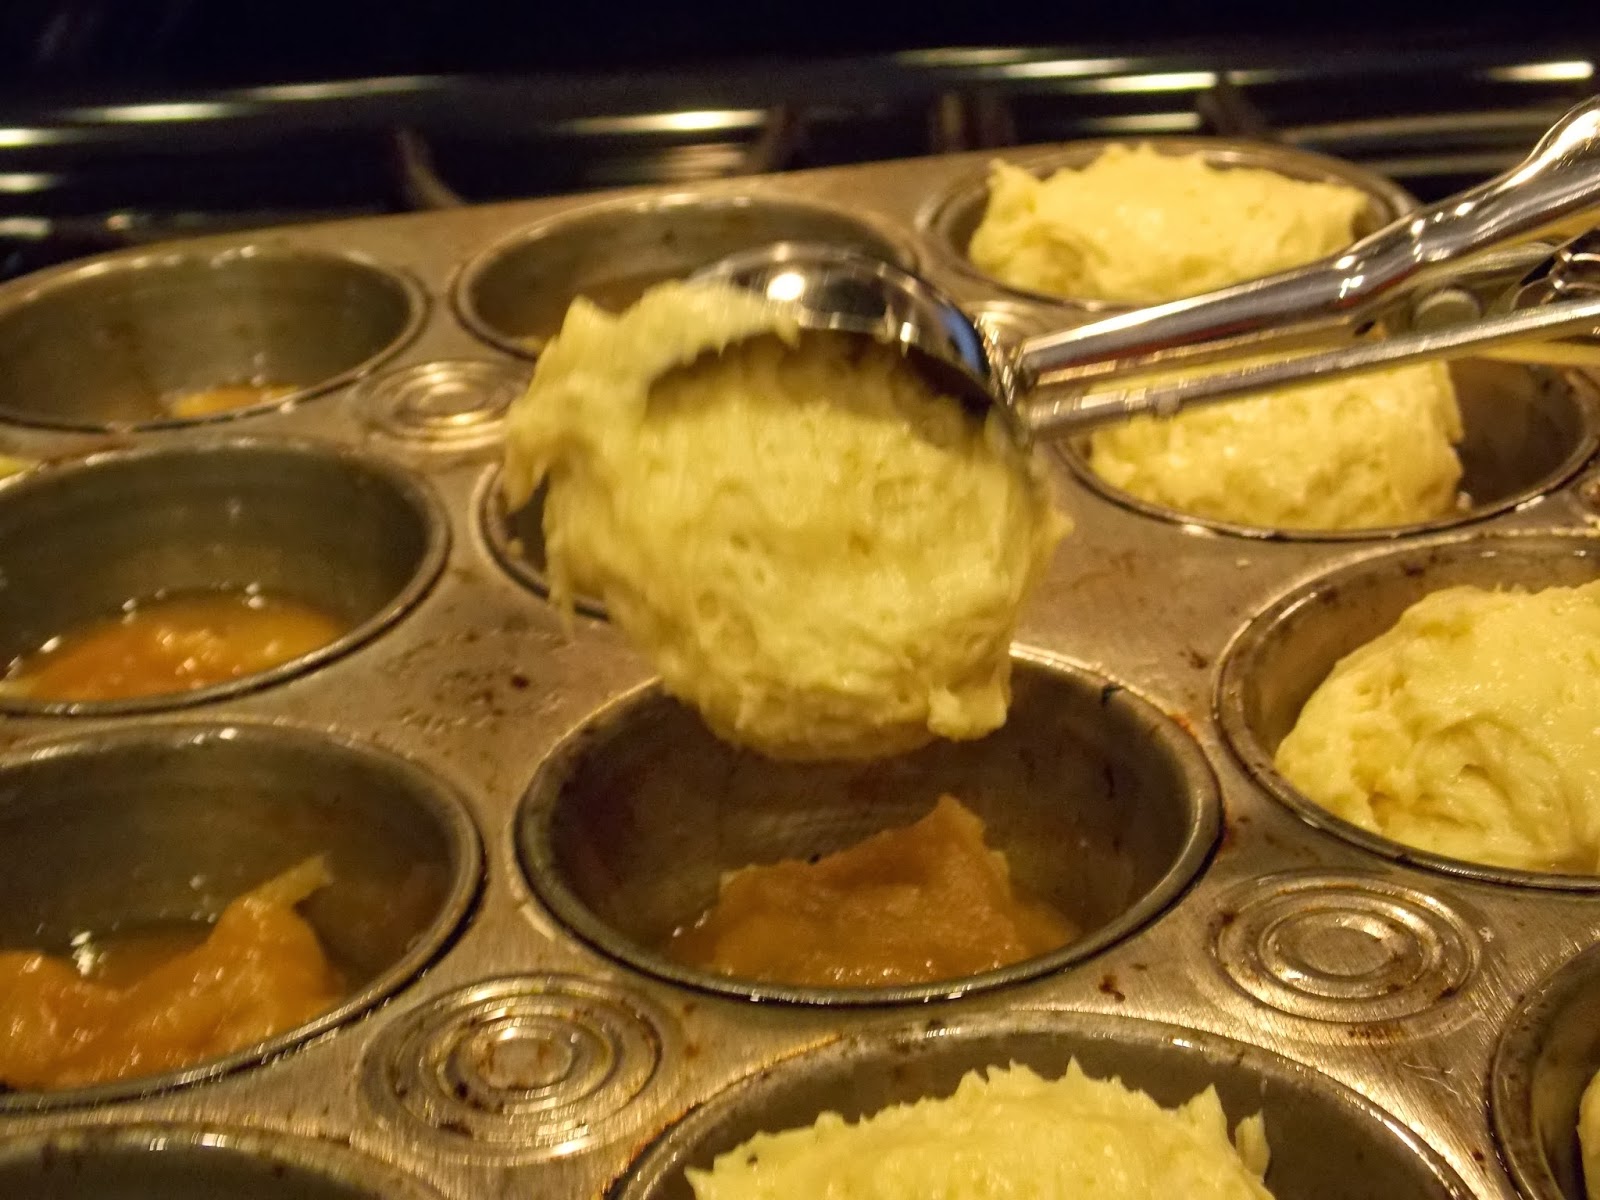
Using a medium scoop, scoop batter into lined cupcake tins. Bake for 20 minutes.

Let cool in pans for 5 minutes, then transfer cupcakes to cooling racks to cool completely.

While cupcakes are cooling, make chocolate filling. 

In a small saucepan over medium heat, mix together cocoa powder, brown sugar, milk, salt and milk chocolate until boiling.


Remove from heat; add butter, vanilla and milk chocolate; and stir until completed mixed. Let cool and thicken.


When chocolate filling has cooled, fill cupcakes. We put the chocolate filling in a squeeze bottle, and used the handle of a spoon to create a whole in the cupcakes. (When I make these again, I will fill the cupcakes with more chocolate filling than this time.)


To make the marshmallow frosting, fill a medium saucepan with 1 inch of water and bring it to a simmer over medium heat.

Place the eggs whites, sugar, cream of tartar and salt in the stand mixer bowl and whisk by hand to combine. Place the bowl in the saucepan, making sure the bottom of the bowl is not touching the water. Heat the egg mixture, whisking constantly, until the sugar has dissolved and the mixture is hot to the touch (about 120° F) about six minutes.

Transfer the bowl to the stand mixer fitted with the whisk attachment. Turn the mixer to medium and whisk for 1 minute. Increase the speed to high and whisk until stiff, glossy peaks form, about 5 minutes more. Add the vanilla and whisk until just incorporated, about 1 minute. 

Transfer frosting to a gallon size zip-top bag and snip a corner to use as a pastry bag. Pipe the frosting onto the cupcakes.

Using a kitchen torch, lightly toast the marshmallow frosting. There you have it - S'mores Cupcakes! Share with your friends and family to bring some sunshine into your life. Enjoy!

After all, "Sunshine is the best medicine!"
~Sheryl


Follow and Like I Can't Believe It's Gluten Free on Facebook.

Sunday, January 19, 2014

Pineapple Upside Down Cupcakes


This one was my mother's idea. She loves pineapple upside down cake, and has been making it for years. I was looking for ideas for some new goodies, and this was her first suggestion. It sounded like a great idea, but since I love singe servings, I decided to make cupcakes instead of a cake. My mom said they were great, but she would have liked them to be a little more crunchy/caramelly on the top. I think I might try to torch them a bit after they come out of the oven next time to see if that works.

In the meantime, here is the recipe. I served these at church this morning, and everyone who tried them, told me they were incredible. Nothing like a bunch of unsolicited praise to support my belief that gluten free goodies can be just as good, if not better, than those with gluten.

What You'll Need:
Small Microwave Safe Bowl
Non-Stick Cooking Spray
Cupcake Tins
Stand Mixer with Paddle Attachment
Medium Scoop
Baking Sheets

Ingredients:
1/2 cup Unsalted Butter, melted
1 cup Brown Sugar, packed
1 can (20 oz.) Pineapple Tidbits
1/2 cup Unsalted Butter, room temperature
1 cup Sugar
2 Large Eggs, room temperature
1 teaspoon Pure Vanilla Extract
3/4 cup Soy Flour
1/2 cup Tapioca Starch/Flour
1/2 cup Potato Starch
1 teaspoon Xanthum Gum
1/2 teaspoon Salt
1 teaspoon Baking Soda
2 teaspoon Baking Powder
3/4 cup Pineapple Juice (reserved from can)

Makes 18 cupcakes

Directions:
Spray cupcakes tins with non-stick cooking spray

In small microwave safe bowl, melt 1/2 cup butter. Add brown sugar and mix well.

Drain pineapple tidbits, reserving liquid for cake batter. Place tidbits in the bottom of each cupcake mold in a star shape.

Spoon one tablespoon of brown sugar mixture over pineapples. 

Preheat oven to 350° F.

In medium bowl, whisk together soy flour, tapioca starch, potato starch, xanthum gum, salt, baking soda and baking powder.

In stand mixer with paddle attachment, cream together 1/2 cup butter and sugar.

Add eggs one at a time, mixing for one minute between each addition.

Add vanilla.

With mixer on low, slowly add dry ingredients.

Keeping mixer on low, add pineapple juice and mix until well combined.

Using medium scoop, scoop batter over pineapples and brown sugar mixture.

Bake for 20-25 minutes or until toothpick inserted in center comes out clean.

Run a knife around the edge of each cupcake, then invert on a baking sheet.

Best served hot. But I have to be honest, I served these the next day, and they were an even bigger hit than I could have imagined. 

For I know the plans I have for you, declares the LORD, plans to prosper you and not to harm you, plans to give you hope and a future. ~Jeremiah 29:11

What a great promise to hold onto. 
~Sheryl


Wednesday, July 17, 2013

Bumpy Cake Cupcakes


Oh Yeah! That is right, bumpy cake cupcakes. Bumpy cake was always one of my favorites as a kid. If you grew up in Michigan, you should be familiar with bumpy cake. If not, that is a true shame, and you have my condolences. 

My mom and I love bumpy cake. Sometimes we would keep one in our freezer. That way, when we got a hankering for it, all we had to do was walk to the kitchen. We usually just cut a piece or two from the cake, and saved the rest for later. Most of the time we didn't wait for it to defrost. It was so hard to be patient, and the cake was even amazing frozen.

These cupcakes are a gluten free tribute to that amazing cake. The second I tasted one, all of those great memories came flooding in. They are ridiculously good. 

What You Will Need:
Cupcake Tins
Cupcake Liners
KitchenAid Mixer with Paddle Attachment
Cooling Racks

Ingredients:
For Cupcakes
1 cup Unsalted Butter, room temperature
2 cups Sugar
4 Large Eggs, room temperature
3/4 cup Cocoa Powder
2 teaspoons Pure Vanilla Extract
1 1/4 cup Soy Flour
3/4 cup Tapioca Starch/Flour
3/4 cup Potato Starch
1 Tablespoon + 1 teaspoon Baking Powder
1 teaspoon Baking Soda
1 teaspoon Xanthum Gum
1 teaspoon Salt
1 1/2 cup Milk, hot

For Buttercream Frosting
1 1/2 cup Unsalted Butter, room temperature
3 cups Powdered Sugar
3 3/4 teaspoons Pure Vanilla Extract

For Chocolate Frosting
18 ounces Semi-Sweet Chocolate
4 1/2 Tablespoons Canola Oil

Directions:
For Cupcakes
Preheat oven to 350°F.

Line cupcake tins with cupcake liners. Set aside.

In a medium bowl, whisk together soy flour, tapioca starch, potato starch, baking powder, baking soda, xanthum gum and salt. Set aside.

In KitchenAid Mixer bowl, beat butter with paddle attachment on medium until smooth - approximately 2 minutes.


Slowly add sugar. Beat on medium-high until fluffy - approximately 4 minutes. Scrape down sides of the bowl with a rubber spatula.


Add cocoa and vanilla. Beat at medium for 1 minute. Scrape down the sides of the bowl with rubber spatula.


Add eggs one at a time. Beat for 1 minute on low-medium after each egg. Scrape down the sides of the bowl with rubber spatula.


Add dry ingredients 1/4 cup at a time with mixer on low. Scrape down sides of the bowl with rubber spatula.


Carefully and slowly add milk. Mix until smooth, scraping down bowl with rubber spatula if necessary.


Scoop batter into prepared cupcake tins.


Bake for 20 minutes or until toothpick inserted in center comes out clean. Cool in pans for 5 minutes, then transfer to cooling racks to cool completely.

I know, these already look incredible, but this is just the beginning. Things are about to get insane.

For the Buttercream Frosting
In KitchenAid Mixer bowl, beat butter with paddle attachment on medium until smooth - approximately 2 minutes.

Slowly add the sugar. Mix on low until well combineds.

Add vanilla. Mix on medium-high until smooth and fluffy.


Fill a gallon size ziploc storage bag with buttercream frosting. Clip the corner of the bag.

Pipe buttercream frosting on cupcakes in two lines. Freeze frosted cupcakes for at least 30 minutes.

For Chocolate Frosting
Chop chocolate.

Place chopped chocolate and oil in a medium, microwave safe bowl.

Heat on high for approximately 1 1/2 minutes in 30 second increments until completely melted and smooth.

Pour chocolate in a container that is just wider than the cupcakes. I used a plastic cup. Dip cupcakes in chocolate, and set on a cooling rack to set.


Now we are talking! You know you want to eat them. If you could just reach into your computer, but that isn't possible. What is possible is you following these directions, and making some of your own. Don't wait! These are going to be one of your new favorites.


Just look at that moist chocolate cake, the sweet buttercream frosting, and the rich chocolate frosting. I think I am drooling just thinking about them. I have had to work really hard not to eat all of them in one day. They are that good!


Ask my son, Tommy, he wanted to eat them all. I think he is sneaking them behind my back. ;)

"Take risks: If you win, you will be happy. If you lose, you will be wise."

In my opinion, either way, you win!
Sheryl