Tuesday, January 7, 2014

Berry Hand Pies


When I was a kid, I was a huge fan of Hostess fruit pies. I loved everything about them - the flaky crust, the gooey fruit filling, the sweet glaze; and how they all worked together to make a delicious treat.

This berry hand pie is an homage to the Hostess fruit pie of my youth. It has a flaky crust, gooey fruit filling and a sweet glaze. Eating them brings back lots of great memories. Will they do the same for you? 

What You Will Need:
Small Saucepan
Shallow Dish
Silicone Mat/Clean Counter
Rolling Pin
Circle Cookie Cutter (Approximately 3")
Cookie Sheets lined with Silicone Mats or Parchment Paper
Cooling Rack

Ingredients:
Pastry Dough (Posted on May 18, 2013)
Filling
2 cups Berries (I used blackberries, but strawberries, blueberries, or raspberries would also be great.)
1 Large Apple (Granny smith would be great, but I used what I had - I think it was a red delicious.); peeled, cored and chopped.
2/3 cup Sugar
2 Tablespoons Unsalted Butter
1 Tablespoon Tapioca Flour/Starch
1/4 teaspoon Cinnamon
2 Tablespoons Milk (for sealing crust and brushing the tops)
2 Tablespoons Sugar (for sprinkling the tops)
Glaze
6 Tablespoons Powdered Sugar
1 Tablespoon Milk

Directions:
In a small saucepan, cook the filling ingredients over medium heat, stirring constantly, until the mixture boils and thickens.

Pour the mixture into a shallow dish to cool.

Preheat oven to 375° F. Place racks in second to top and second to bottom slots.

On a lightly floured silicone mat or clean counter, roll out the pastry dough with a rolling pin to approximately 1/8"-1/4" thickness. Cut the dough with the circle cookie cutter.


Place a circle of dough on a lined cookie sheet, and place a heaping Tablespoon of filling in the center of the circle.

Take another circle of dough and press it between your thumb and fingers to flatten it slightly, so it is bigger than the bottom circle. 

Wet the edges of the bottom circle with milk.

Place the slightly stretched circle over the filling and line up the edges of the two circles. Press the edges with a fork to seal the edges together.

Cut a small x in the top of the hand pie.

Brush the top of the hand pie with milk.

Sprinkle with Sugar.

Bake for 15 minutes on top rack, then switch to bottom rack and bake for an additional 15 minutes or until golden. If baking two cookie sheets at once, place one sheet on each rack and swap at 15 minutes.

Transfer the hand pies to cooling racks to cool completely.

While hand pies are cooling, mix the glaze ingredients in a small bowl with a spoon.

Drizzle the glaze over the cooled hand pies.

Let the glaze set completely before serving or storing in an airtight container.

Yummy! These hand pies are perfect for a picnic or to stick in your lunch for a special treat. How about surprising your husband and/or kids by sneaking one in their lunch? Now that is a great idea.

"You are confined only by the walls you build yourself."
Don't let your walls confine you. Dream big, tear down your walls, and go after your dreams! 
~Sheryl

Sunday, January 5, 2014

Raspberry Almond Coffee Cake


Coffee cake - is it breakfast or dessert? Does it matter? I don't think so. It's delicious either way!

This sweet cake is filled with a layer of cinnamon sugar; a layer of sweet, juicy raspberries; and topped with an almond crumble. Whether you serve it for breakfast or dessert, it is sure to be a crowd pleaser - even if it is a crowd of one.

Just a note: This recipe makes a large coffee cake. If you aren't serving it to a crowd, you might want to consider freezing individual pieces for those mornings when you are running late and need something to grab and go. 20-30 seconds in the microwave should be just enough.

Although I haven't tried it yet, I'm sure this would be just as amazing with blueberries, peaches, or apples. Give it a try, and let me know what happens.

What You Will Need:
9" Springform Pan
Non-Stick Cooking Spray
Stand Mixer with Whisk Attachment

Ingredients:
Crumb Topping
1/2 cup Soy Flour
1/4 cup Tapioca Starch/Flour
1/4 cup Potato Starch
1 teaspoon Xanthum Gum
3/4 cup Brown Sugar, firmly packed
1/2 teaspoon Salt
1/2 cup Slivered Almonds, chopped and toasted
1/2 cup Unsalted Butter, cold & cut into 1/4 inch cubes
Cake
3/4 cup Soy Flour
1/2 cup Tapioca Starch/Flour
1/4 cup Potato Starch
1 teaspoon Xanthum Gum
1/2 teaspoon Baking Powder
1/2 teaspoon Baking Soda
1/4 teaspoon Salt
1 cup Sugar
1/2 cup Unsalted Butter, room temperature
1 teaspoon Pure Vanilla Extract
2 Large Eggs
1 cup Milk
Cake Filling
3 Tablespoons Sugar
1 Tablespoon Cinnamon
2 cups Raspberries

Directions:
To make the crumb topping, in a small bowl, whisk together the soy flour, tapioca starch, potato starch, xanthum gum, brown sugar and salt.

Stir in the nuts.

Add the butter.

Work together with your fingers until lumps the size of peas form. Refrigerate until ready to use.


Preheat oven to 350° F. 

Spray the springform pan with the non-stick cooking spray.

To make the cake, in a medium bowl, whisk together the soy flour, tapioca starch, potato starch, xanthum gum, baking powder, baking soda and salt. Set aside.

In a stand mixer with the whisk attachment, beat together the butter and sugar on medium until light and fluffy.

Beat in vanilla.

Add eggs one at a time, beating until well mixed and fluffy between each addition.


With mixer on low, slowly add the dry ingredients and the milk, alternating between the two, starting with the dry and ending with the dry.


Pour half of the batter into the springform pan.

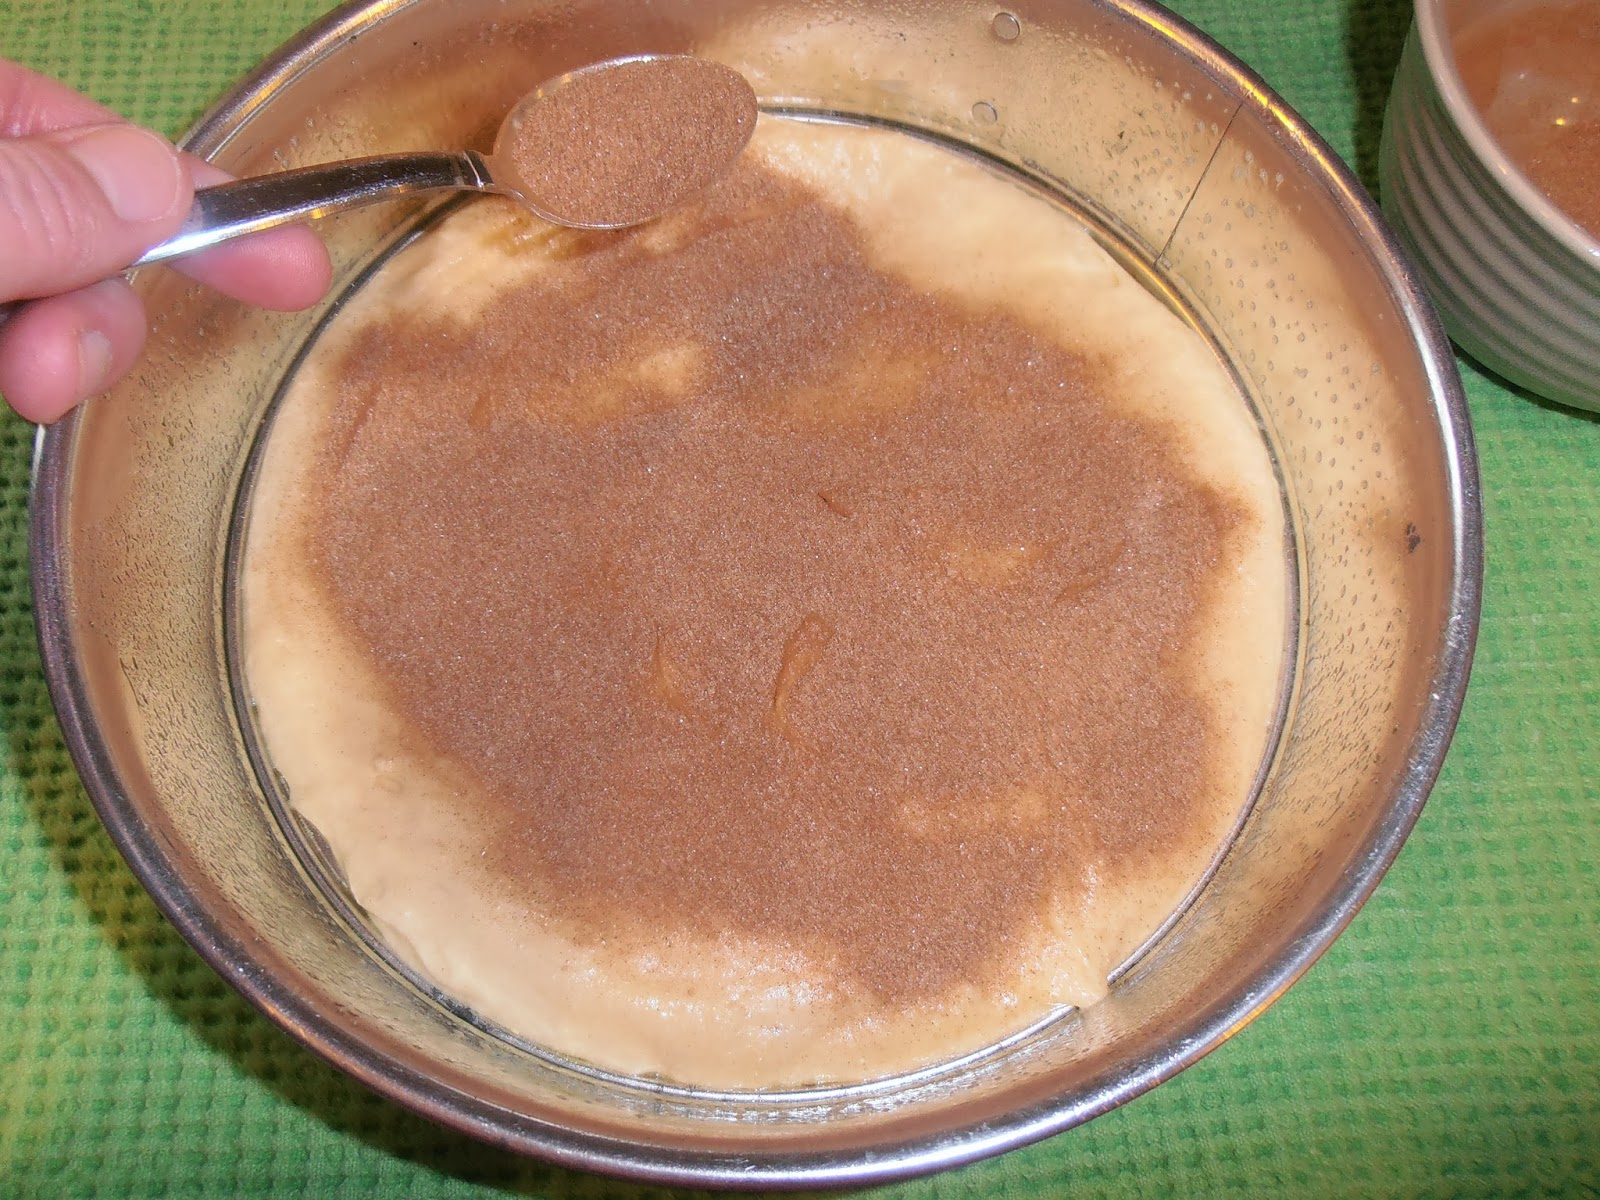
To make the filling, in a small bowl, mix together the sugar and cinnamon. 

Sprinkle the mixture over the batter in the springform pan.

Spoon the remaining batter into the springform pan over the filling mixture. Smooth the top.

Pour raspberries evenly over batter.


Sprinkle crumb topping over raspberries.

Bake cake for 60-80 minutes or until tester inserted into the center comes out clean. Let cool completely in pan.

Remove the sides of the pan, and store in an airtight container at room temperature.

You are probably thinking that I am going to say serve it with coffee, but I'm really not a coffee kind of girl. I prefer tea, but even that isn't my favorite. However, if you like coffee or tea, either would go well with this cake. If not, it is great all by itself.

"The price of anything is the amount of life you exchange for it."
Just something to think about.
~Sheryl

Wednesday, January 1, 2014

White Chocolate Macadamia Nut Cookies


Happy New Year! Welcome to 2014. I hope this year brings exciting new adventures for you. I think I'll help you get started with this recipe for white chocolate macadamia nut cookies. That is an exciting adventure, if I do say so myself. 

I've always loved white chocolate macadamia nut cookies. Maybe it is that whole sweet and salty thing. You know, the best of both worlds. Although, I am a die-hard chocolaholic, I still put these cookies at the top of my favorites list. Aside from their amazing flavor, I love how they hold their shape and stay nice and fluffy, that is due in part to chilling the dough before baking it. Make sure you don't miss that important step. 

I'm sure you are going to love them as much as I do. Start the new year with this new recipe, and enjoy the adventures of 2014.

Ingredients:
1 cup Unsalted Butter, room temperature
3/4 cup Brown Sugar, firmly packed
3/4 cup Sugar
2 Large Eggs, room temperature
2 teaspoons Pure Vanilla Extract
1 cup Soy Flour
3/4 cup Potato Starch
3/4 cup Tapioca Starch/Flour
1/4 cup Corn Starch
1 1/2 teaspoons Xanthum Gum
1 teaspoon Baking Soda
1/2 teaspoon Salt
1 jar Macadamia Nuts (approximately 1 cup), cut in quarters
1 cup White Chocolate Chips

Directions:
In a medium bowl, whisk together the soy flour, potato starch, tapioca starch, corn starch, xanthum gum, baking soda and salt. Set aside.

Cut the macadamia nuts in quarters. Set aside.

In a standmixer bowl, cream together the butter, brown sugar and sugar until fluffy.

Add the eggs.

Add the vanilla.

Slowly add the dry ingredients.

Add the macadamia nuts.

Add the white chocolate chips. Mix just until combined.

Using a medium scoop, scoop the cookie dough into balls and place in a container with wax paper between the layers. Refrigerate cookie dough balls for at least one hour. 

Preheat the oven to 350° F.

Place the cookie dough balls on silicone lined cookie sheets - 8 per sheet.

Bake on the middle rack of the oven for 16-18 minutes.

Cool on the cookie sheets for 2 minutes, then transfer to cooling racks to cool completely.

Look at those golden delicious disks of goodness! How long can you wait before you have to make (and eat) these? 

"Write it on your heart that every day is the best day in the year." ~Ralph Waldo Emerson

Lots of people place a lot of importance on New Year's Day - like it is the best day of the year, because of new beginnings, etc. But really every day is a new beginning, so make every day the best day.
~Sheryl